
This guide explains how to integrate your DecoNetwork system with Sage Business Cloud Accounting, allowing your customer, invoice, product, and transaction data to sync automatically with your accounting platform.
Once configured, data from DecoNetwork is transferred directly into Sage Accounting, reducing manual data entry and minimizing errors in your accounting workflow.
Before commencing, we recommend that you read the Accounting Integration Overview so that you understand how the accounting integration feature works, what benefits it provides, and what is supported by this setup.
Note, the integration only supports one-way data syncing; i.e. DecoNetwork into Sage Accounting. In order to get your customer data from Sage Accounting into DecoNetwork, you will need to use the Import Customer tool in Business Hub. See the article, Import Customers, for more information.
In this article
- Prerequisites
- Why integrate with Sage Accounting?
- Step 1: Set up the DecoNetwork to Sage connection
- Step 2: Configure Sage Accounting to Work with DecoNetwork
- Step 3: Configure integration options in DecoNetwork
- Step 4: Complete and test the configuration
- Step 5: Take the integration out of test mode
- Step 6: Sync your data
- Accounting Sync Queue
- Sync History
- Best-practice tips
- Troubleshooting
- FAQs
- Additional resources
Prerequisites
- Admin access in DecoNetwork
- A Sage Business Cloud Accounting account
- Be operating in one of the supported regions (e.g., UK, US, Canada, EU countries)
- A working understanding of your business accounting processes
Why integrate with Sage Accounting?
Connecting DecoNetwork with Sage Accounting helps streamline your financial workflow and ensures accurate record-keeping across your systems.
- Eliminate manual data entry: Automatically sync customers, invoices, and transactions
- Reduce errors: Avoid mistakes caused by manual accounting processes
- Save time: Free up your team to focus on production and sales
- Improve visibility: Keep your accounting data up to date with real-time transactions
Step 1: Set up the DecoNetwork to Sage connection
- Log into your DecoNetwork Website.
-
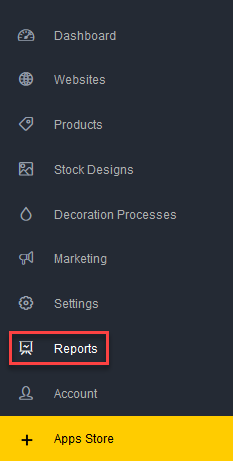
Browse to Admin → Reports.
-
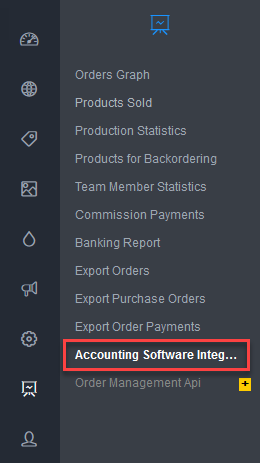
Select Accounting Software Integration.
-
Click on the Sage One button.
-
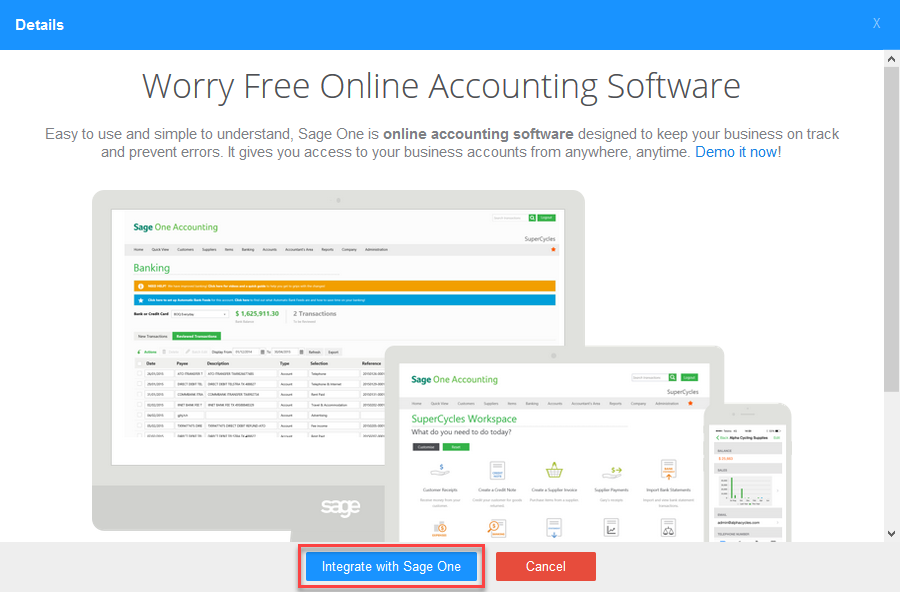
Click Integrate with Sage Accounting.
- Click on the Connect button.
-
Choose your country or region.
Note that only the United Kingdom is currently supported.
-
Enter your Sage Accounting account Email Address in the Sage Accounting Login dialog.
- Click Continue.
-
Enter your password.
- Click Continue.
-
Click Allow to authorize DecoNetwork access to your Sage Accounting account data.
Step 2: Configure Sage Accounting to Work with DecoNetwork
Before connecting DecoNetwork to Sage Accounting, you need to configure Sage Accounting with the appropriate mappings to allow for seamless integration. The following settings in Sage Accounting are recommended to ensure that DecoNetwork is able to synchronize your data. It is likely that your business will already have at least some of these settings configured if you are already using Sage Accounting. As always, give careful consideration to any configuration items that you may need to change and seek advice from your Sage Accounting professional if you are unsure.
-
Create a DecoNetwork Customer
When you configure the DecoNetwork and Sage Accounting integration you will have 3 options for syncing customers:
- Create individual customer records in Sage Accounting for each order by an account holder and import all other orders from DecoNetwork into a single customer record
- Create individual customer records in Sage Accounting for all orders
- Import all orders from DecoNetwork into a single customer record
If you wish to use options 1 or 3, you need to create a generic DecoNetwork customer in Sage Accounting, which will be the same customer used to map all customers who place an order in DecoNetwork.
-
Set up Order Line Item Mappings
Each order line item in DecoNetwork needs to be mapped as a physical or a service item in Sage Accounting. With the physical items (i.e. the products that you sell) you can choose to record them using a single generic item in Sage Accounting. If you choose to use a single item, you need to manually create a physical item in Sage Accounting, which will be the same item used to map all products sold in DecoNetwork.
If you choose not to use the same item to record your product sales, the system will automatically sync your products from DecoNetwork into Sage Accounting.
Mappings for all services, extra charges, and credit items that you offer in DecoNetwork need to be specified individually. However, you can choose to combine these into a few items or a single item if you wish. You can use the same item as you use for products if you choose. Otherwise, create service items in Sage Accounting for the following services that you offer:
- Shipping Item
- Gift Certificate Item
- Rush Order Fee Item
- Digitizing Fee Item
- Artwork Fee Item
- Screen Setup Fee Item
- Extra Charge Item
- Freeform Item
- Order Discount Item
- Coupon Discount Item
- Order Credit Item
- Tax Adjustment Item
-
Configure Tax Settings
Taxes configured in Sage Accounting should match the tax rates that are used in your DecoNetwork store.
In countries that use VAT, settings are configured under Settings → Business Settings → Accounting Dates and Vat.
In other countries, settings are configured under Settings → Business Settings → Sales Tax.
-
Configure Payment Methods
The payment methods that are configured in DecoNetwork must have a corresponding account in Sage Accounting. (You can view the payment methods available in DecoNetwork under Admin → Settings → Payment Methods).
To create an account in Sage Accounting, go to Settings → Business Settings → Chart of Accounts.
-
Set Up Suppliers
The suppliers that are specified in DecoNetwork must have a corresponding account in Sage Accounting. (You can view the suppliers specified in DecoNetwork under Admin → Products → Supplier Account Details).
To create a supplier in Sage Accounting, go to Contacts → Vendors → New Vendor.
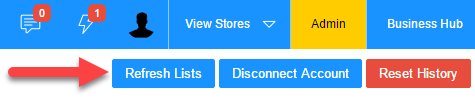
Configuration changes between DecoNetwork and Sage Accounting are not live. Changes in configuration between the two must be manually updated by clicking Refresh Lists on the DecoNetwork configuration page to pull Sage Accounting configuration data down into DecoNetwork.
Step 3: Configure integration options in DecoNetwork
The configurable items in DecoNetwork are each described briefly below with considerations and advice on the option used in most cases. Remember to click Refresh Lists to pull down the configuration information each time you make changes in Sage Accounting to any of the configuration items described in the previous section:
- Under Admin → Reports → Accounting Software Integration, click Configure.
-
Click Refresh Lists.
- Configure Order/Invoice Options:
-
Automatically Recalculate Pending Items - - Choose whether you want DecoNetwork to recalculate items that need syncing, each time you apply the Sync Now command.
- If you choose ‘Yes’, DecoNetwork will automatically calculate items that need syncing and sync them.
- If you choose ‘No’, you will need to first view the sync queue to manually update the queue before you can sync the new pending items.
Typically choose Yes, unless you want to manually recalculate items affected by a Sage change.
-
Order Syncing - Choose the stage at which you want order data in DecoNetwork to be synced with order data in Sage Accounting:
- Sync orders when they are invoiced: will sync orders once they are marked as invoiced (occurs when an order is marked as shipped, or manually marked as invoiced).
- Sync orders when they are placed: will sync orders as soon as they are placed.
- Sync orders when they are awaiting shipping: will sync orders when they are marked as production complete and have the Awaiting Shipping status.
- Sync orders when they are shipped: will sync orders when they are marked as shipped.
- Exclude Orders Before - Transactions from DecoNetwork will not be synced if they occurred before this date. Leave blank to include all orders. However, if there is a cutover between which system is handling orders, you may consider using that date as the exclusion date. Typically left blank to include all orders.
-
Include Test Orders - Choose whether you want test orders to be sent to Sage Accounting while your site is in testing mode.
- Choosing ‘Yes’ will allow you to test syncing before you go live.
- If you choose, ‘No’ no data will be sent to Sage Accounting until you go live.
Typically set to No, unless you want orders from your site, while not live or in testing, to be sent to Sage Accounting.
- Test Mode - While set to 'Yes', DecoNetwork will only send 1 order and 1 purchase order to Sage Accounting at a time. Once you are happy that the transactions are being handled properly, set it to 'No' so Sage Accounting becomes live-updated by DecoNetwork. Start with this set to Yes and change to No when you are confident in the system.
- Search Existing - Will check Sage Accounting for existing matches of order numbers on the same date and with the same customer. If a match is found DecoNetwork will update the existing Sage Accounting invoice instead of creating a new invoice. Typically set this to Yes.
-
Customer Syncing - Choose a customer syncing option:
- Create a SageOne customer account for all account holders, but use the same SageOne customer for all other Internet orders: choose this option if you want DecoNetwork to automatically create a customer account for each customer who is an account holder and use a single customer account to record orders for customers who are not account holders.
- Create a SageOne customer account for all orders: choose this option if you want DecoNetwork to automatically create a customer account for all orders
- Use the same SageOne customer for all orders: choose this option if you want to use a single customer account to record orders for all customers
The default option of using a Sage Accounting customer account for all orders gives the best detail. The other options of using a single customer account for either all orders or just for Internet orders both reduce the number of Sage Accounting accounts but at the cost of detail. Typically this is set to create a customer account for all orders.
- Single Customer - If, for the customer syncing option, you choose to use the same customer account for all orders or for customers who are not account holders (option 3 or option 1), this generic customer will be used for syncing.
-
Use Same Item? - Choose whether you want to use the same item to record all line items ordered in DecoNetwork:
- If you choose ‘Yes’, DecoNetwork will sync all order line items to a single item in Sage Accounting (i.e. Use the same product in each order line in Sage Accounting).
- If you choose ‘No’, DecoNetwork will record all order line items as separate products in Sage Accounting (i.e. Import the product specifics with each order from DecoNetwork).
This is typically set to No so DecoNetwork items are imported into Sage Accounting.
- Item Sales Ledger Account - This is used to specify the destination account for the sale of (blank) products. Typically, this is set to Sales.
- Item Tax Rate - If you selected No for Use Same Item, this will be the default tax rate that will be associated with blank products created when syncing.
- Tax Exempt Rate - This is the equivalent tax-exempt definition in Sage Accounting for orders that are tax-exempt in DecoNetwork.
- Sync Purchase Orders - If enabled, purchase orders are sent to Sage Accounting. If purchase orders are being used in DecoNetwork, set to Yes.
- Purchase Orders Account - If Sync Purchase Orders is set to 'Yes', then this field is used to define which account is making the purchase orders in Sage Accounting. This account comes from the Sales and Purchases Accounts in Sage Accounting.
-
-
Configure Order Line Item Mappings.
If you have chosen to set up separate line items in Sage Accounting for additional service items, (i.e. fees, charges, credits, and discounts), that you have configured in DecoNetwork, these are configured here. Items can include:
- Shipping Item
- Gift Certificate Item
- Rush Order Fee Item
- Digitizing Fee Item
- Artwork Fee Item
- Screen Setup Fee Item
- Extra Charge Item
- Freeform Item
- Order Discount Item
- Coupon Discount Item
- Order Credit Item
Select the account you have designated in Sage Accounting for each of the fees from the drop-down list. If the drop-down list is empty or incomplete, ensure you have created these accounts in Sage Accounting and clicked Refresh Lists.
-
Configure Tax mappings.
The different taxes that you support should have corresponding accounts configured in Sage Accounting. Select them here from the drop-down boxes.
-
Configure Payment Method Deposit Accounts.
Select the accounts that each payment method will deposit money into from the drop-down boxes. This should be an account such as "Undeposited Funds" or another current asset.
-
Configure Vendors/Suppliers
If you chose 'Yes' for Sync Purchase Orders, you will need to select the corresponding supplier accounts you have configured in Sage Accounting for each of the suppliers you use in DecoNetwork.
-
Configure Vendor/Supplier Taxes
If you chose 'Yes' for Sync Purchase Orders, you will need to select the Sage Accounting tax rate corresponding to the DecoNetwork tax rate for each of your supplier accounts.
- Click Save.
Step 4: Complete and test the configuration
The final steps are to make sure the configuration is correct and that Sage Accounting is receiving data from DecoNetwork in the expected fashion. Initially, this is in test mode where only a single order, purchase order, and payment are synced with every push. Once you are satisfied the systems are working together correctly, put DecoNetwork into Live mode.
-
At the Sage Accounting Integration page, click Sync Now (Test Mode).

- Once syncing is complete, you will be notified of any errors encountered.
-
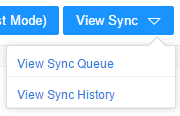
Check the status by clicking View Sync → View Sync History.
This outlines the sync that took place. View the details by clicking View Log. Any errors will be revealed, which should be rectified.
Sync logs that are more than eight weeks old will be removed to clear up storage space.
-
Once any errors have been fixed, click Sync Now (Test Mode) again.
DecoNetwork will re-attempt to sync transactions that had errors the next time you click Sync Now. If the error does not reappear after a subsequent sync, you know if the condition that caused it has been rectified.
If a transaction will not sync and the cause is not fixable, the transaction must be manually added to Sage Accounting. You should stop the transaction with the unfixable error from attempting to sync. Go to View Sync → View Sync Queue, and disable the transaction you no longer want to sync.
- Repeat the process until no more errors are appearing.
- Once testing is complete, take integration out of Test Mode.
Step 5: Take the integration out of test mode
- Click Configure.
-
Set Test Mode to No.

- Click Save.
- In the Breadcrumb, click Accounting Software Integration.
- Click Sync Now to run a full sync.
Step 6: Sync your data
Syncing to Sage Accounting does not occur automatically. However, you can run a sync whenever you like. To initiate a sync:
-
Browse to Admin → Reports → Accounting Software Integration.
-
Click the Sync Now button at the top right.
Accounting Sync Queue
The Sync Queue shows the entries of pending sync requests that are waiting to be synchronized into Sage Accounting the next time a sync is initialized. When there are any updates to your customer, invoice, product, order, and transaction data in DecoNetwork, a record will be added to the sync queue. During the next synchronization, successful syncs will be removed from the queue and any failed sync attempts will be added back to the queue with an error message detailing the reason why the sync failed.
-
Browse to Admin → Reports → Accounting Software Integration.
-
Click the View Sync button at the top right toolbar and select View Sync Queue.
The sync queue is displayed in the work area.
- Type: You can filter the search queue by the following types; order, customer, product, payment, refund, credit, and purchase order.
-
Name: You can search for records by name. Enter the name in the search field and click Search.
You need to enter the name exactly as it is stored in the system. Copy it from your sync log to make sure you have entered it correctly.
- Status: You can filter the search queue by the following statuses; Not synced, Waiting, Blocked, Error, and Synced.
- Last Result: Shows the outcome of the last sync.
- Last Error: Shows the error message of the entry resulting from the last sync. In order for the next sync to be successful, you need to rectify an error, then tell DecoNetwork that the record needs to be synced again so it can be recreated. To do this, click the Actions button next to the record and select Unmap from the dropdown. Performing these steps will put the record back into the sync queue to be sent over to the accounting software on the next sync attempt.
- Block: You can choose records to be omitted from the next sync by ticking the Block checkbox corresponding to the record.
Sync History
The Sync History page shows a report of past sync attempts. For each sync attempt, the date, state, and result are shown. The sync history page is a valuable tool to monitor and troubleshoot integration issues.
-
Browse to Admin → Reports → Accounting Software Integration.
-
Click the View Sync button at the top right toolbar and select Sync History.
The Sync History page is displayed in the work area.
Best-practice tips
- Start with test data before syncing live transactions
- Keep account mappings consistent across systems
- Regularly review the sync queue for errors
- Document your accounting setup for future reference
Troubleshooting
Data is not syncing to Sage
- Check that the integration is connected and authorized
- Verify Test Mode is disabled (if going live)
- Review the Sync Queue for errors
Transactions appear incorrectly in Sage
- Review account and tax mappings
- Ensure consistent configuration between systems
Authentication errors occur
- Reconnect the Sage account
- Confirm login credentials are correct
FAQs
Does the integration sync data both ways?
No. Data flows one way: from DecoNetwork to Sage Accounting.
Can I import customers from Sage into DecoNetwork?
Yes, but you must use the Import Customers tool in Business Hub.
What data is synced?
Customers, invoices, payments, products, and purchase orders.
Should I test before going live?
Yes. Always validate your configuration using Test Mode first.
Additional Resources
Still have questions? Use the Search Tool at the top of the page to find more related guides. Need help? Click the icon to submit a support ticket—our Client Services team is ready to assist!
Comments
0 comments
Please sign in to leave a comment.