All widgets include a Layout Properties tab in the settings. The layout properties allow you to configure the way in which a widget is arranged.
Watch the video below for a quick overview of the layout properties for widgets, and read below for more detailed instructions and information on configuring these settings.
To configure the layout properties of a widget:
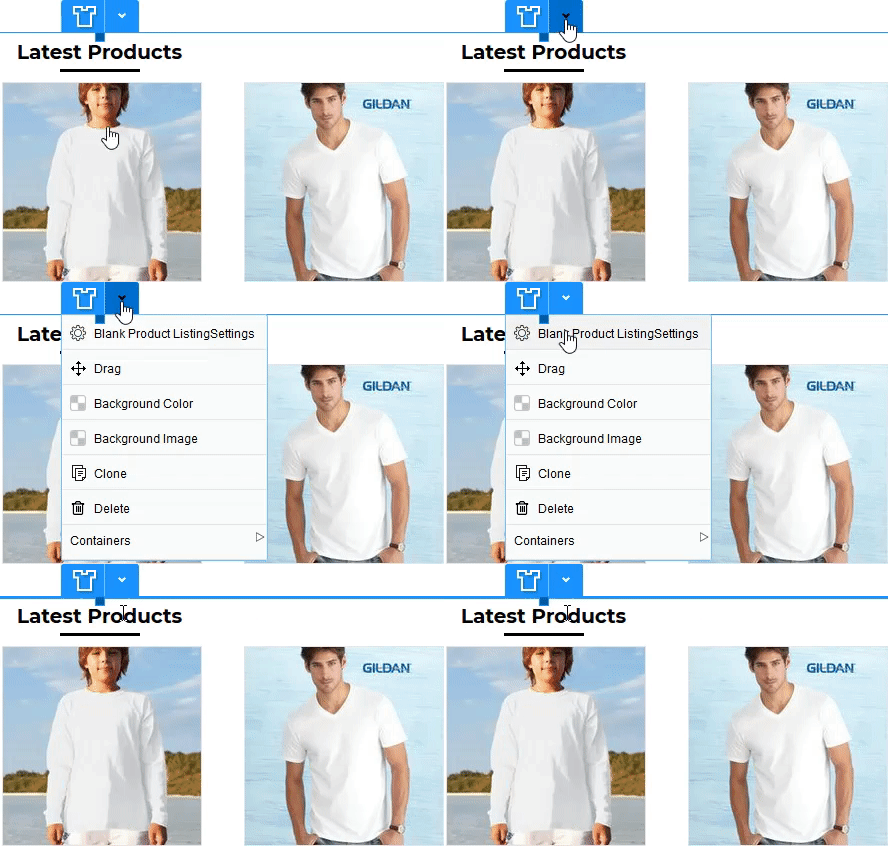
- Mouse over the widget.
The widget's controls will be displayed.
- Click on the down arrow beside the widget icon.
- Choose the Settings item from the drop-down menu.

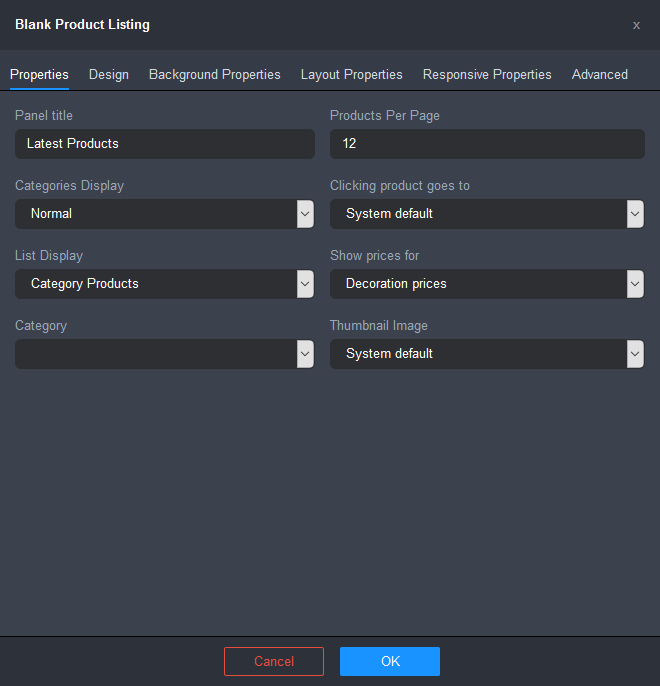
The widget Settings popup will be displayed.

- Click on the Layout Properties tab.

- Configure the settings as required.
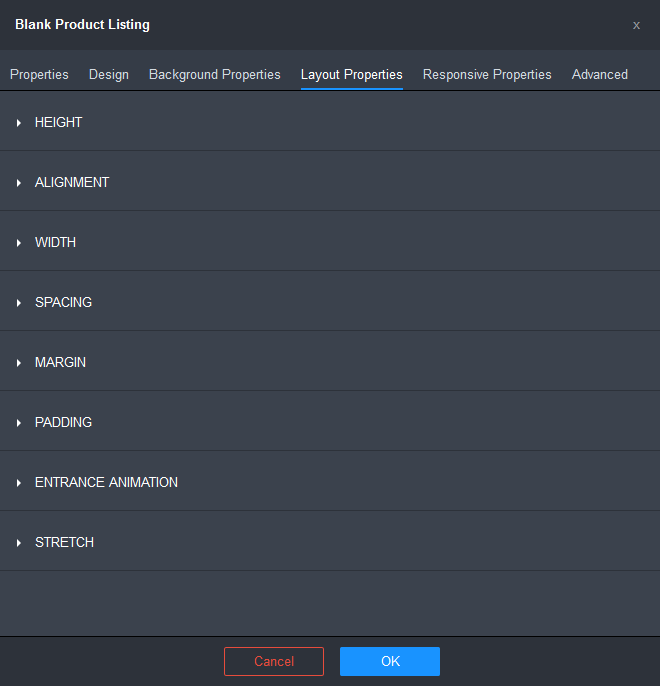
The Layout Properties tab is organized into groups of options. The options will vary depending on the widget selected.
HEIGHT
The Height settings let you set the height of the container in which the widget is enclosed. To configure the height settings:
- Click on the HEIGHT row to expand the section.

- Tick the Set Min Height checkbox if you want to set minimum height option for the widget container.
The Min Height field will be displayed

- Specify a Min Height value.
You can choose to specify the Min Height value in one of the following units:
- px (pixels): Specify a value between 0 and 2000
- vh (viewport height): allows you to specify the height of the widget container as a percentage of the viewport.
ALIGNMENT
The Alignment setting lets you set the placement of the widget container within its parent container. To configure the alignment settings:
- Click on the ALIGNMENT row to expand the section.

- Choose an Alignment option:
- Left: aligns the widget container to the left of the parent container.
- Center: horizontally centers the widget container inside the parent container.
- Right: aligns the widget container to the right of the parent container.
WIDTH
The Width setting lets you set the width of the widget content. To configure the width settings:
- Click on the WIDTH row to expand the section.

- Choose a Width option:
- Auto: uses a pre-set default value for the widget content, dependant on device size.
- Full Width: will make the content in the widget the full width of its parent container.
- Custom: allows you to set a custom width value.
You can choose to specify the Custom Width value in one of the following units:
- %: lets you specify the width of the widget content as a percentage of the widget's parent container.
- px: lets you specify the width of the widget content as an exact pixel value.
SPACING
The Spacing settings let you configure the horizontal spacing between elements within the widget. To configure the spacing settings:
- Click on the SPACING row to expand the section.

- Select an option from the Spacing drop-down:
- Default: uses a default spacing value.
- None: no spacing is applied.
- Small: uses a pre-defined small sized spacing.
- Medium: uses a pre-defined medium sized spacing.
- Large: uses a pre-defined large sized spacing.
- X-Large: uses a pre-defined extra-large sized spacing.
- Custom: allows you to set a custom spacing value, in pixels.
MARGIN
The Margin settings let you specify spacing around the borders of the widget content. To configure the margin settings:
- Click on the MARGIN row to expand the section.

- Specify the margin settings:
- Top Margin: the space above the top border of the widget content.
- Bottom Margin: the space below the bottom border of the widget content.
For the top and bottom margins, you can choose from a number of pre-defined sizes or specify a custom size:
- Default: uses a default margin value.
- Small: uses a pre-defined small sized margin.
- Medium: uses a pre-defined medium sized margin.
- Large: uses a pre-defined large sized margin.
- X-Large: uses a pre-defined extra-large sized margin.
- Custom: allows you to set a custom margin value.
You can choose to specify the custom top and bottom margin values in one of the following units:
- %: lets you specify the margin as a percentage of the widget's container width.
- px: lets you specify the margin as an exact pixel value.
- Left Margin: the space to the left of the widget content's left border.
- Right Margin: the space to the right of the widget content's right border.
You can choose to specify the left and right margin values in one of the following units:
- %: lets you specify the margin as a percentage of the widget's container width.
- px: lets you specify the margin as an exact pixel value.
PADDING
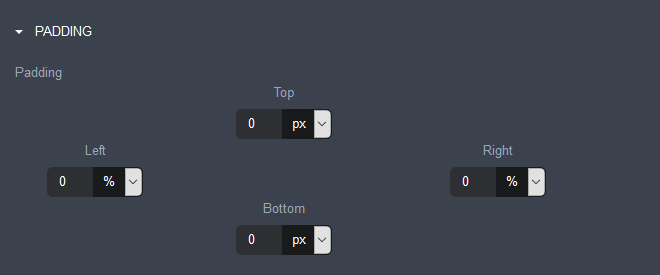
The Padding settings let you specify spacing inside the borders of your widget content. To configure the padding settings:
- Click on the PADDING row to expand the section.

- Specify the margin settings:
- Top: the space below the top border of the widget content.
- Right: the space to the left of the right border of the widget content.
- Bottom: the space above the bottom border of the widget content.
- Left: the space to the right of the left border of the widget content.
You can choose to specify the padding values in one of the following units:
- %: lets you specify the padding as a percentage of the widget's container width.
- px: lets you specify the padding as an exact pixel value.
ENTRANCE ANIMATION
The Entrance Animation settings let you choose transition effects that animate how your widgets enter the webpage. To configure the entrance animation settings:
- Click on the ENTRANCE ANIMATION row to expand the section.

- Choose an Entrance Animation option:
- None: no animation is applied.
- Fade in: the widget will gradually fade into focus.
- Slide in from left: the widget will move into position from the left.
- Slide in from right: the widget will move into position from the right.
- Slide in from top: the widget will move into position from the top.
- Slide in from bottom: the widget will move into position from the bottom.
- Slide in from left (bounce): the widget will move into position from the left and bounce back and forth a number of times before coming to a rest.
- Slide in from right (bounce): the widget will move into position from the from the right and bounce back and forth a number of times before coming to a rest.
- Slide in from top (bounce): the widget will move into position from the top and bounce up and down a number of times before coming to a rest.
- Slide in from bottom (bounce): the widget will move into position from the bottom and bounce up and down a number of times before coming to a rest.
- Grow: the widget will gradually enlarge to its final size.
- Grow (bounce): the widget will gradually enlarge to its final size and bounce a number of times before coming to rest.
STRETCH
The Stretch settings let you configure a widget to cover the full width of the page. To configure the stretch settings:
- Click on the STRETCH row to expand the section.

- Tick the Full Page Bleed checkbox if you want to stretch the widget to cover the entire width of the page.
- Click on the HEIGHT row to expand the section.
- Click OK, once you have finished configuring the settings.
- Click on the Save button and then click on the Publish button at the right of the Page Settings Bar.
Comments
0 comments
Please sign in to leave a comment.