The Import Products feature allows you to mass create or update a large number of blank custom products by importing pre-configured data and image files into the system. The import process involves importing a collection of files, of a variety of formats, each containing part of the configuration data required to completely build a single product. Details and examples of the required import files, along with instructions for their use are described in the article, Required Files for Importing Products.
Prerequisites
- You must have administrator access to use this feature
- This feature is for advanced users with knowledge of CSV file format
- Make sure you have created the required files and that they are correctly configured and of the correct formats before you attempt an import.
To import products
- Log into your DecoNetwork Website.
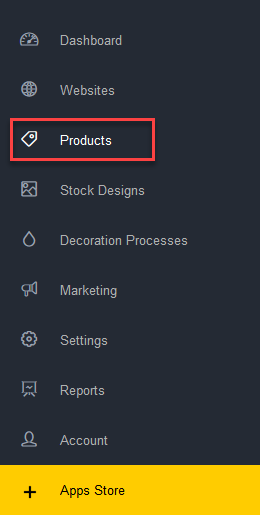
- Browse to Admin > Products.


- Click Import, then click Import Products.

- You will see a list of previous product imports.
- Click Start New Import to launch the import wizard.

- Follow the wizard steps to complete the import.
Step 1 of 5: Welcome
Name your import and click Next.
Step 2 of 5: Upload files
Step two of the wizard lets you upload the files required to configure your products. Different component file types need to be uploaded separately by selecting the component you want to upload:
- Auto: Our system will analyze the uploaded file and detect the included data components. Can be an individual file or a ZIP archive.
- SKU CSV file: Product SKU data in CSV format containing all product information. For an example, see the Product Data file in the Required Files for Importing Products article.
- Product Image: Use when uploading individual JPG or PNG images file that is used as a sales image, product view image, lifestyle image, size chart image, product information image, or thumbnail image.
-
Color Palette: Color data in CSV format containing the color values for the product. These values can be defined in RGB or hex format and are used to generate a color swatch for each color. For examples, see the Product Data file in the Required Files for Importing Products article.
Additionally, you can associate a swatch image with a color by specifying a file name in the SwatchImage column. The file name references the image file that will be uploaded during the product import, which is useful for representing patterned colors, such as Camo.
- Size Chart: Size chart data in CSV format containing size information for products. For an example, see the Product Data file in the Required Files for Importing Products article.
- Spec Sheet: File containing product information and is usually supplied by the product vendor. Should be a PDF file. This file will be made available to customers when viewing the details page for a product or in the design tool by clicking "Product Information".
- Zip File: A compressed archive consisting of multiple files. DecoNetwork will unzip this file and treat each file as an "Auto" file. Often the most manageable way to run the import.
To Upload a file
- Select the appropriate component file type.
- Click on the Browse... button.
- Select and open the file you want to import.
- Click on the Upload button.
- Repeat steps 1 to 4 for each file you want to upload.
A completely uploaded set of files will still require decoration area configuration before the product can become available for sale. This configuration is carried out manually on a per-product basis from the product list screen. If parts of the configuration data or component files are missing from the upload, an incomplete product will be built, which can be fixed also through manual product configuration from the product list screen.
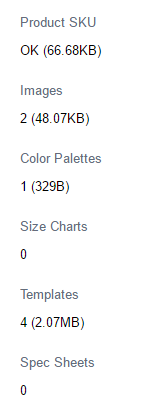
A summary of the files that have been uploaded for the import is presented in the Uploaded Files section at the bottom of the screen.

Once all files are ready to import, confirm the system is ready to accept by scanning the lower part of the screen and making sure no error messages exist.
If there are error messages, the format of one or more uploaded files is incorrect. To fix this, cancel the import, check and fix the relevant file, and restart the import.
When ready, click Next.
If the Product SKU file is missing, the Next button will not be enabled.
A popup will be displayed containing a progress bar showing the import progress. When the import is completed, click the Continue button.
Step 3 of 5: Options
The options set on this page determine how the import will handle the imported data. By default, the settings on this page will treat the import information as new product data and add it to the existing product range being available for sale. However, the importer can be used for the purposes of updating existing products as well as adding new products, discontinuing products that are not re-imported, and removing categories that are not imported.
- Configure the import options as required:
Matching Options
- Match products, if ticked, will overwrite existing product information based on the existence of VendorProductCode, size, and style information. Products in the system with this same combination of data will have all their SKU data updated to match the data in the SKU CSV file. If "Match products" is not ticked, duplicate entries will be made instead of updating or overwriting existing products.
- Restore matched deleted products, if ticket, will restore deleted products that are matched with items in the SKU CSV file
- Discontinue unmatched products, if ticked, will delete any product not included in the SKU CSV, using VendorProductCode as the matching criteria.
- Discontinue unmatched SKU, if ticked, will remove any SKUs from products for which data was not included in the SKU CSV file.
- Update color values, if ticked, will overwrite existing color data values with the new imported values provided in your color palette CSV file.
- Update order of sizes, if ticked, will update the sort order of sizes on existing matched products to reflect the order in the SKU CSV file.
Category Options
- Create missing categories will build a new category for a product if categories contained within the uploaded file are not found within your site. If the category information is new and this option is set to off, or the category information is missing, then the product will be placed into the default category for the product based on the product group specified in DNProductType. (Visit the Product Groups menu item for a list of existing defaults).
- Remove categories from products if missing from SKU data, if ticked, will remove any categories not present in the imported SKU data.
Validation
- Allow products with no views, if ticked, will allow products to be imported if their view information is not set or product view files are not uploaded.
- Allow missing files, if ticked, will allow a product to be imported if it is missing some of its configuration files. These can be manually repaired via that product's configuration page. If un-ticked and files are missing, the product will not be imported.
Initialization
- New products marked as configured, if ticked, will put products that do not have errors up for immediate sale at the end of the import.
- Create missing brands, if ticked, the import will create new Brands if they appear in the import files but are not already in the system. Otherwise, you will get an error when importing, letting you know that some products are not imported due to missing brands.
- Don't assign default decoration areas to product views, if ticked, the system will skip the step of adding decoration areas during the import.
- When ready click Next.
Step 4 of 5: Check
DecoNetwork will then run a check on the files to be imported and any issues discovered can be reviewed. If you are not happy with the results you may either click Back, which goes to the previous step (note you cannot unload files from the import) or you may click Cancel (the only way to fix real issues). When ready, click Complete.
Step 5 of 5: Review
The product import will be complete and a review page is available to check the results. You should view the configuration of each imported product as it will need to be completed, by setting up decoration areas at a minimum.
Comments
0 comments
Please sign in to leave a comment.