The Map Widget allows you to embed Google Maps on your website page to show the physical location of your store. The Maps Widget uses the Google Maps Embed API that provides limited layout and zoom customization. You can enable full customization by applying for a Google Maps Javascript API Key. Usage of the Maps Javascript API is billed under a pay-as-you-go pricing model. Up to 100,000 map loads per day are allowed free of charge. After that, you are charged a fee per additional map load. Click here to see the Maps Javascript pricing details.
In this article, you will learn how...
- To add a Map Widget to your website
- To configure the design settings for the Map Widget
- To obtain a Google Maps Javascript API Key
To add a Map Widget to your website:
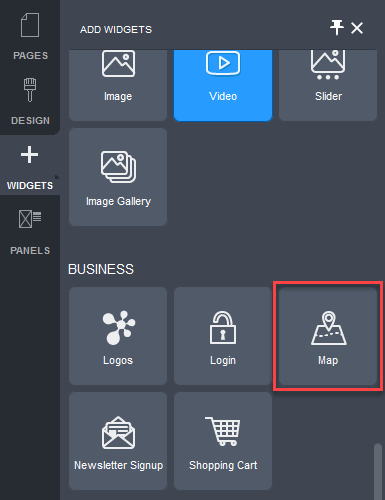
- Click on the WIDGETS button in the Website Editor Toolbar.
- Browse the Widgets tab to locate the Map Widget in the BUSINESS section.

- Click and drag the Map Widget onto your website page.
Allowable areas the widget can be inserted into include:
- Within rows
- Within columns
- Above or below existing widgets
- Between existing widgets
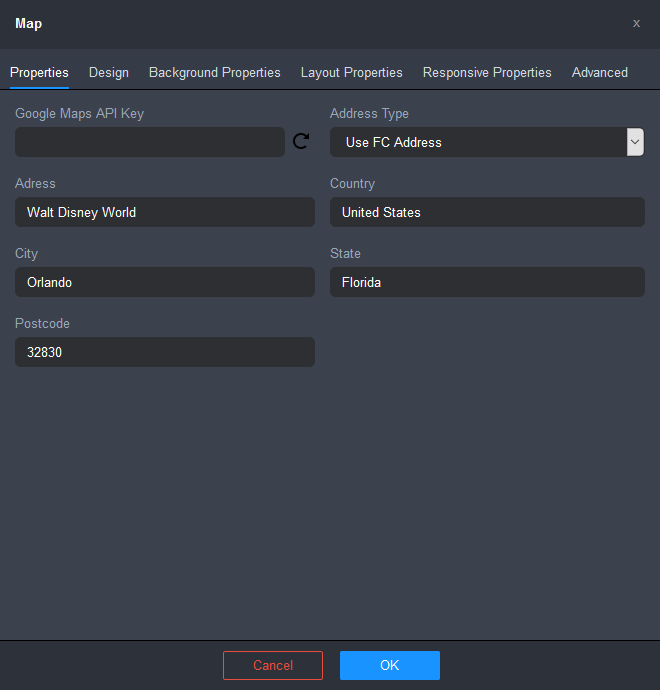
Once the Map Widget is inserted into your web page, the Map Settings popup will be displayed, with the Properties Tab selected.

- Optionally, enter your own Google Maps API Key.
- Select an Address Type:
- Use FC Address: choose this option if you want the map to show the Fulfillment Center's address.
- Use Custom Address: Lets you enter an alternate address. Click on the Reload icon to reload the map with the new address:
 .
.
- Use Google Place ID (only available if you are not using Google Maps API Key): choose this option if you want the map to show the address of your Google places listing. When this option is selected, the Google Place ID field will be displayed, allowing you to enter your Google Place ID number.

- Click OK.
- Click on the Save button and then click on the Publish button at the right of the Page Settings Bar.
To configure the design settings for the Map Widget:
- Click on the Design tab in the Map Settings popup.
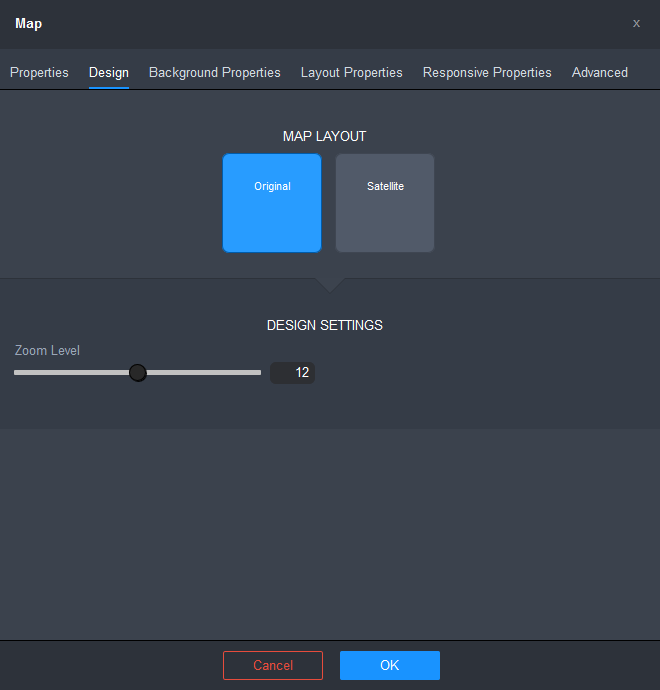
The settings for configuring the design of the Map Widget will be limited if you have not entered an API key.

Settings available when API Key has not been supplied.

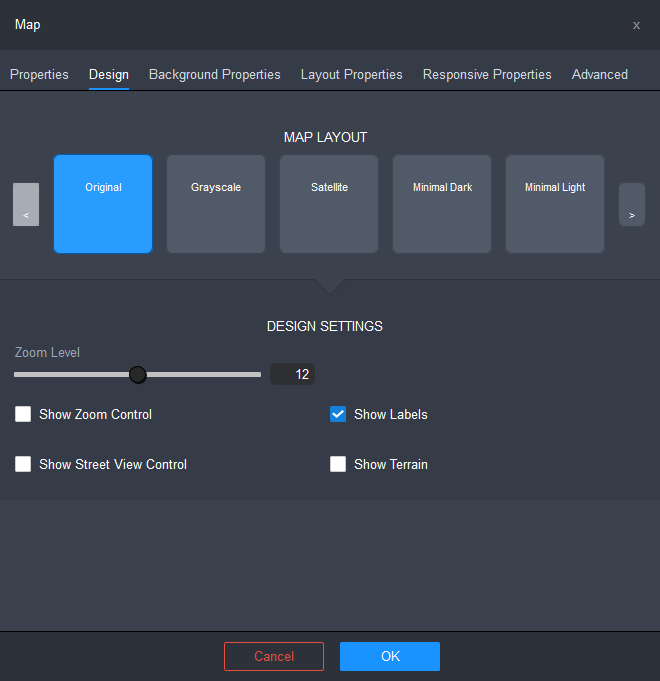
Settings available when API Key has been supplied.
- Select a Map Layout style.
- Configure the design settings for the Map Widget.
- Zoom Level: lets you specify the zoom level of the map as an integer which defines the resolution of the viewable area. Use the slider or enter an integer in the Zoom Level field.
The following settings are only available if you are using your own API key:
- Show Zoom Control: when this checkbox is ticked, a zoom control will be available, which displays + and - buttons, allowing your website visitors to change the zoom level of the map.
- Show Street View Control: when this checkbox is ticked, a control is displayed which contains an icon that can be dragged to enable a 360° photographic view, if available for the current location.
- Show Labels: when this checkbox is ticked, labels for places on the map will be displayed. When the checkbox is unticked, just the map will be shown.
- Show Terrain: when this checkbox is ticked, imagery of the terrain will be shown on the map.
- Click OK to save the changes.
- Click on the Save button and then click on the Publish button at the right of the Page Settings Bar.
To obtain a Google Maps Javascript API Key:
- Visit https://developers.google.com/maps/documentation/javascript/get-api-key.
- Click "GET STARTED".
- Tick the "Maps" checkbox and click "CONTINUE".
- Follow the prompts to set up an account and obtain your API Key.
Comments
2 comments
How does one navigate to the widget section?
We are running v8.004
My screen does not look like yours??
Hi Doug,
The Widget section is available in the Website Pages Editor. Access the Website Pages Editor by going to Admin > Website > Manage > Edit Website > Website Pages.
Read the Website Pages WYSIWYG Editor help article for instructions on how to access the Website Pages Editor.
Please sign in to leave a comment.