
Decoration areas define the specific regions on a product where designs, such as printing or embroidery, can be applied. DecoNetwork provides pre-defined sets of standard decoration areas for popular product types. These product types are grouped into decoration categories, which are separate from the product categories used to organize your products.
Standard decoration areas are automatically assigned to products added from supplier catalogs. When creating custom products, you can apply these existing decoration areas or create your own.
You can customize the default decoration categories and areas to better match your business needs and production equipment. Changes are applied globally across all products that share the decoration area. You can:
- Add new categories
- Rename decoration areas
- Enable or disable decoration areas for specific product categories
- Adjust the dimensions of each decoration area
- Select which decoration processes each area supports
- Create new decoration areas within each category
In this article
- Prerequisites
- Why manage decoration areas?
- Step 1: Access the Decoration Areas page
- Step 2: Configure decoration areas
- Step 3: Save and apply your changes
- Best-practice tips
- Troubleshooting
- FAQs
- Additional resources
Prerequisites
- You must have Admin access to your DecoNetwork account.
Why manage decoration areas?
Well-configured decoration areas help you:
- Ensure customers and staff only see valid regions for artwork placement on each product.
- Align decoration areas with the physical capabilities of your production equipment (e.g. maximum print/embroidery size).
- Apply consistent settings across multiple products by managing areas at the category level.
- Control which decoration processes are available in each area (e.g. screen print, DTG, embroidery).
- Expose some areas only to internal staff in Business Hub while hiding them from customers in the Designer.
Step 1: Access the Decoration Areas page
- Log into your DecoNetwork Website
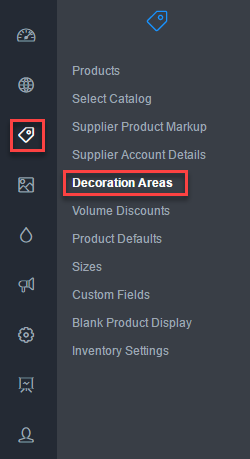
- Browse to Admin → Products.
-
Select Decoration Areas.
A list of existing product decoration area categories is loaded into the workspace.
Click the image to enlarge.
- Each category represents a group of similar products (e.g. T-Shirts, Caps) that share a set of decoration areas.
- Within each category, you manage the individual decoration areas that can be used on products in that category.
Step 2: Configure decoration areas
- On the Decoration Areas page, choose how you want to configure your areas:
-
Scale decoration areas when changing physical dimensions: by default, when changing the physical dimensions of a master decoration area, the visual display of the decoration area in the blank product Views & Decoration Areas page and in the Designer is constrained to fit within the bounds of the previous dimensions while maintaining the required aspect ratio. This can result in an inaccurate visual representation of the decoration area. Tick this checkbox to visually enlarge or shrink the decoration areas based on the new physical dimensions for a more accurate representation.
When configuring a blank product or viewing it in the Designer, the shape you select determines how the decoration area appears. A visible outline is displayed for all shapes to help identify and highlight the decoration area:
- Rectangles have a solid border.
- Rounded rectangles have a border with rounded corners.
- Circle and ellipse shapes display a solid circular border.
- Custom shapes (uploaded masks) have a dotted outline to indicate the area’s boundary.
- Add Category lets you define a name category Name. Click OK when done.
-
Edit lets you configure a category. The edit screen shows a list of defined decoration areas for the category.
- A decoration area with the checkbox set to ON will make the area on the product available for decoration.
- The small graphic displays the location of the decoration area on the product.
- Name is a label describing the decoration area. The number next to the name is the number of products using that decoration area. Thus by modifying the decoration area, you are simultaneously modifying the number of products indicated.
- rename lets you change the name of the decoration area.
- Dimensions sets the Height and Width of the decoration area. This must suit what your equipment is capable of producing.
- Processes lists the decoration processes that are capable of using the decoration area, as indicated by the presence of the checkbox being toggled to ON.
- BH Only when ticked, will make the decoration area only available in Business Hub. The decoration area will not be visible to customers using the Designer if this option is ticked.
- The arrowed handle may be dragged and dropped to move the decoration area up or down to rearrange its order in the list.
- Delete lets you remove a decoration area for the category you are editing. (Only custom decoration areas can be removed).
- Add Area lets add a new decoration area for the category you are editing.
Use the drag handle to reorder decoration areas.
-
Step 3: Save and apply your changes
-
When you are done configuring categories and decoration areas, click Save.
The changes will be applied to every manually added product and every catalog product using the decoration areas. This may take several minutes - time to grab a coffee!
Best-practice tips
- Use clear, descriptive names (e.g. "Back Yoke", "Left Chest") rather than generic labels like "Area 1".
- Keep decoration area sizes within the safe production limits of your equipment to avoid rework or rejected jobs.
- Use BH Only areas for internal-only placements, such as production notes or special print zones.
- Define decoration areas at the category level where possible to ensure consistency across similar products.
Troubleshooting
Problem: A decoration area is not visible in the online Designer.
Check:
- Verify that the area is not marked as BH Only.
- Confirm that at least one decoration process is enabled for the area.
- Make sure the product’s Views & Decoration Areas page has that area turned on for the view.
Problem: Changes to area size do not appear to match the visual representation.
Check:
- Confirm that Scale decoration areas when changing physical dimensions is enabled.
- Refresh the product in the Designer and, if necessary, clear your browser cache.
Problem: Delete button is not available for decoration area.
Check:
- Ensure the decoration area is not a system area.
Problem: Deleted Decoration area still appears on products.
Check:
- Verify the area is removed from both the category and product view settings.
FAQs
-
Can I apply the same decoration area to many products at once?
Yes. Define the area in the appropriate Decoration Area category and then enable it on products that belong to that category via their Views & Decoration Areas settings. -
Can I remove a standard decoration area?
Only custom decoration areas can be deleted. Standard areas supplied with catalogs can be disabled for a category, but not permanently removed. -
What happens if I delete a category?
All associated decoration areas are removed from products using that category.
Additional resources
- Create Custom Decoration Area Shapes
- Configuring Product Views & Assigning Decoration Areas
- Enable a Decoration Process on Decoration Areas in Bulk
Still have questions? Use the Search Tool at the top of the page to find more related guides. Need help? Click the icon to submit a support ticket—our Client Services team is ready to assist!
Comments
7 comments
How do you add a decoration area? For instance, we want to add "Neck label" as an option. I added the neck area, but was not able to define the actual location of the area.
Admin - products - [select a product] - Views and Decoration Areas
For the view (front / back / etc) press Add Area.
At the bottom of this screen (scroll down) choose "or, define a new area"
Following this process will save a new area which can be used on other products.
Good luck and happy decorating!
Thanks @adam! How do you then add it in bulk? I went to "Decoration Areas" but that area is not defined there... I want to be able to add a neck label to all apparel screen printed items. See below it was added to a specific product, but doesn't show up
Decoration areas:
To make the area available to multiple products, go to Products - Decoration Areas and define it in there. The area will then be available for products of the same type as the category you add the area to (that will make sense when you see the screen). Make sure you save the new decoration area and then go back to your product(s) to add it.
The placement will need to be turned on for every product and confirmed as the right location though - as no two products are exactly alike it can't be totally automatic. For example a neck label on a scarf is not in the same spot as a shirt. However the defined area (Neck Label in your case) will be available to quickly add as a decoration placement area.
Is it possible to use Product Groups to assign a custom design area as default to a bulk amount of different products?
If product groups contained decoration area settings it would be a logical thing to be able to define the default area. However as product groups do not have any decoration area settings attached to them, the answer is unfortunately no.
This should be a feature.
Please sign in to leave a comment.