If you have added custom fields to capture specific data to be used in the system for your own unique business purposes. Custom fields are not included in the order sheet templates by default. This article shows you how to modify order sheet templates to include custom field data.
(See the Customer Fields help article for detailed information about custom fields and how to use them.)
Prerequisites
- You must have administrator access to use this feature
- To edit HTML templates, an understanding and knowledge of HTML is required
- The Email and order templates app must be enabled to use this feature if you are on the Standard plan
To modify order sheet templates to include custom field data
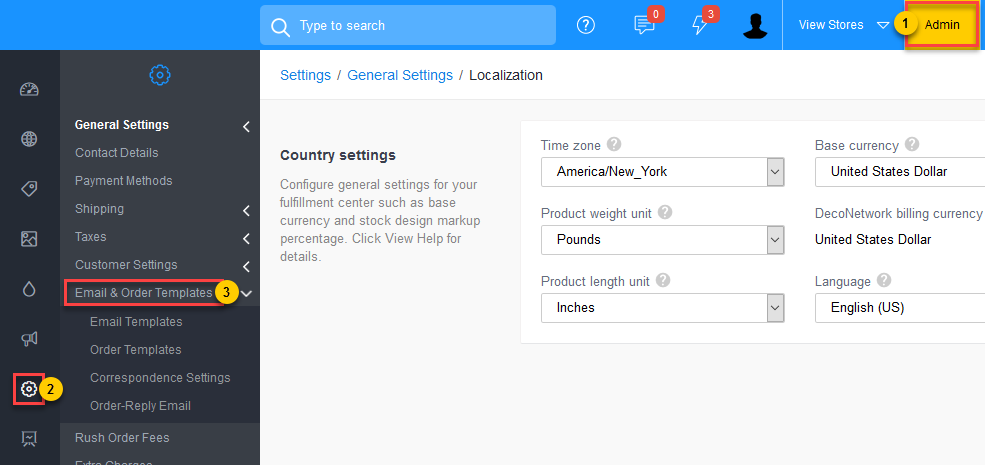
- Log into your DecoNetwork website and click Admin.
- Click Settings.
- Click Email and Order Templates.
- Click Order Templates to display the list of order templates.
The Order Templates page is displayed.
- Click Edit beside the template you want to modify.
The order template edit page is displayed.
- Select Customize template from the menu at the left.
The Customize Template screen is loaded in the main work area. This section contains an editor allowing you to edit the code of the order sheet template.
- Decide where you want to display the custom field on your worksheet. It is a good idea to click on Test Template (right upper corner) so you can see the default template.
Say you want to add a custom field right below the email address under the contact details as shown below:
- Locate this spot in the code. The easiest way to do it is by using the Find option in your browser. For example in Mozilla you can press Ctrl+F on the keyboard and the Find option will appear at the bottom of the page. Then type “email” in the Find field because you want the custom code to be added right below the email. The Find feature should take you to that place in the code.
- Once you find the code, you just need to add the variable along with the description right below the email.
The code to add the variable is in the format {{customer.custom_fields.xxx }}
Where xxx is the name of the field in lowercase, with all non-alphanumeric fields changed to "_"
i.e.: “Test Field” = “test_field”Note: A non-alphanumeric character is anything that is not A-Z or 0-9.
Say you have a custom field called "Student's Name". In this case, your variable is {{customer.custom_fields.student_s_name}}
To include the Student Name custom field in the Order template, for example, you can add this:
<span>Student's Name: {{customer.custom_fields.student_s_name}}</span>
as shown below:
Where <span></span> is the code that will display the student's name on the next line in the worksheet.
Student’s Name is the title for the content that comes next.
{{customer.custom_fields.student_s_name}} displays the information provided by the customer during the checkout.
- Click Save.

Comments
0 comments
Please sign in to leave a comment.