
You can quickly generate purchase orders from the Purchase Orders page in Business Hub, making it easy to order the stock needed to fulfill your sales orders. This page shows the number of items ordered by customers that require a purchase order.
By using the Create Purchase Order option, you can automatically generate a purchase order for the selected supplier with all necessary products—saving time and reducing the risk of manual entry errors. When triggered, DecoNetwork will create a single purchase order that includes all required items across eligible orders, further streamlining your stock ordering process.
If you’re using the Batch Production app, separate purchase orders can be created for batch and non-batch stores.
Prerequisites
- You must have Administrator and/or Purchasing permission to use this feature.
- "By default, all products go to purchase ordering" must be checked in the Purchase Order Workflow Settings.
- You must have suppliers defined in your Fulfillment Center settings for the products ordered.
To create an automatic purchase order:
- Log into your DecoNetwork website.
- Browse to Business Hub > Purchase Orders.
At the top of the page, you'll find a summary showing the total number of items that need purchase orders. Below that, at the left, you'll see a list of suppliers, along with the number of items you need to order from each of them, allowing you to choose which suppliers to create purchase orders for.
If the Batch Production App is enabled, the Purchase order page will include an extra control to create purchase orders for batch stores separately from non-batch stores.
- If you want to create a purchase order for a batched store, click on the Select Store(s) link to select the store you want to create a purchase order for.
The Select Stores popup will be displayed.
Tick the checkbox of the desired store and click on the Select button.
A list of suppliers, along with the number of items you need to order from each of them will be displayed under the Batched Stores section.
- Select a supplier from the required list.
- Click on the required Create Purchase Order button.
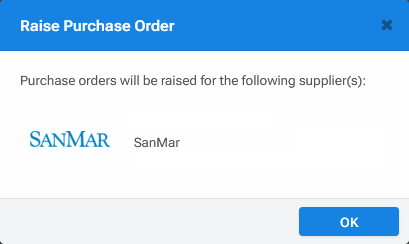
The Raise Purchase Order popup will be displayed, listing the supplier that the purchase order will be raised for.If there are unsent purchase orders for a specific supplier, you can choose to create a new purchase order or combine it with an existing one.
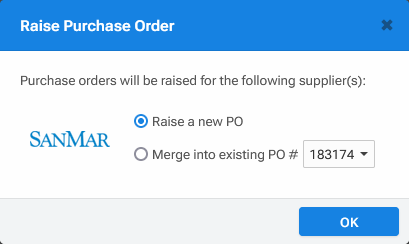
- If given the choice, select an option:
- Raise a new Purchase Order
- Merge into existing Purchase Order. Select the purchase order to merge with from the dropdown box.
- Click OK.
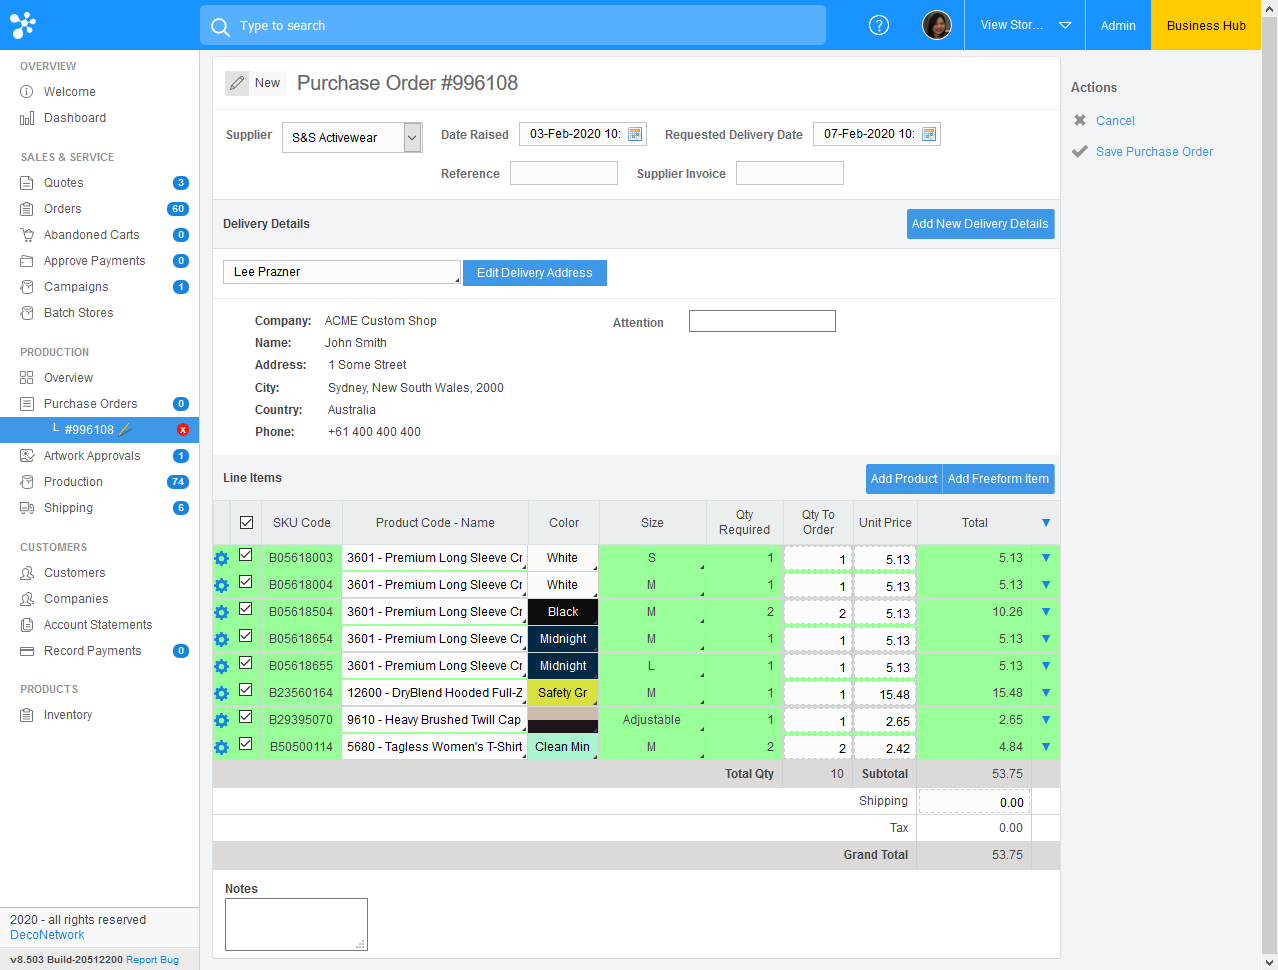
A purchase order is created, listing the codes, colors, sizes, and quantities of the products required.
Click the image to enlarge.
- If the supplier supports SmartPO Integration and it is not enabled, a banner will be displayed on the purchase order form, indicating this. Enabling SmartPO Integration allows your system to check stock availability, generate purchase orders instantly, and then you can email them directly from the Business Hub to suppliers for fulfillment.
If you have access permission (Administrator or Products Manager), you will be able to click on the Manage Suppler button to go to the setting to enable SmartPO integration.
- If the supplier supports SmartPO Integration and it is enabled and correctly set up, a "Use SmartPO Integration" checkbox will appear in the purchase order form. It will be ticked by default. You can un-tick it before saving to disable SmartPO Integration for the purchase order.
Enable SmartPO Integration by going to Products > Supplier Account Details > Edit Supplier.
-
When raising a purchase order with SmartPO Integration enabled, the system automatically performs a stock check each time new line item quantities are specified. If the stock levels for any item are insufficient, several actions will occur:
- SmartPO Integration Option: The "Use SmartPO Integration" checkbox will be automatically deselected.
-
Prompt Notification: A prompt will be displayed at the top of the page, advising you to either deselect out-of-stock items or adjust the SmartPO options to enable SmartPO Integration.
-
Warning Indicators: A warning label will appear beside any line items that are out of stock.
Please note that if you change the selected warehouse, the system will perform another stock check to ensure accuracy based on the new warehouse inventory.
- When raising a SmartPO for suppliers who support multiple warehouses and "Auto Select" is selected from the Warehouse drop-down list, 3 extra fields will be available.
Read the Manage Suppliers help article for information about how to configure these fields.
The Auto Select feature allows multiple warehouses to be used to fulfill an order. The supplier will build multiple orders to satisfy the order. When multiple warehouses are used:
- There will be multiple invoice numbers displayed against the purchase order.
- The multiple orders are combined to give a single PO amount for shipping, tax, and grand total.
- An icon is displayed beside the SKU code of each line item that will display a popup showing the warehouse the item is from when the mouse pointer hovers over it. It is possible for a single line item (SKU) to be ordered from multiple warehouses.
- You can choose which items to leave out of the purchase order by unticking the checkbox in the left-most column. By default, all items are selected. (You can make all items be unselected by default via Settings > Purchase Order Settings). The rows of selected items are highlighted in green.
The checkbox at the top of the checkbox column allows you to deselect/select all items at once.
- You can substitute the product in a line item by clicking on its "Product Code - Name" cell. The Product list will be displayed, allowing you to choose a different product for the sales order that is linked to the line item.
When a product has been substituted in a line item that is linked to an order, this will be indicated by a 'substitution' link beside the SKU Code.
Clicking on the link will open a Product Substitution popup explaining the substitution with a reference to the original product and the substituted product.
Note, the substituted product will remain linked to the original sales order. The sales order will only move into production-ready status once the substituted product has been received. If the product is not required, untick the checkbox for the line item. Do not simply replace the product in the line item with another product that you need as it will affect the production workflow. If you need to order additional products, unrelated to any sales orders, add a new line item instead.
- You can expand an individual row to show all sales orders that contain the product by clicking on the blue arrow at the end of the row.

Click the image to enlarge.
When a row is expanded, you can order additional quantities to keep as stock. You can tick the checkbox at the beginning of the Allocate to Stock row to add a quantity of 1 to inventory or you can specify an amount in the Qty To Order field.
You can expand all rows at once to show all linked sales orders by clicking on the arrow at the top of the table in the header. Click on the arrow again to contract all rows.
If you have defined order display colors based on Due Date, the order rows will be color-coded accordingly. Click here for instructions on how to configure order display colors.
For each order line, the full name of the person who placed the order will be displayed along with the name of the store from which the order was placed. The company name will also be displayed if a company is specified for the customer.
- If the supplier supports SmartPO Integration and it is not enabled, a banner will be displayed on the purchase order form, indicating this. Enabling SmartPO Integration allows your system to check stock availability, generate purchase orders instantly, and then you can email them directly from the Business Hub to suppliers for fulfillment.
- Optionally, add a note for one or more SKUs.
- Click on the cog icon at the left of a line item. A menu will appear.
- Click on the create line item note link.
The Add Line Item Note popup will be displayed.
- Enter a note.
- Click OK.
When a note has been created against a line item, a note icon will appear in front of the SKU code. Hover the mouse pointer over the note icon to see the note.
Notes will appear below each line item in the purchase order PDF.
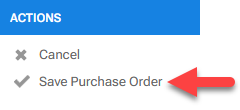
- Click Save Purchase Order.
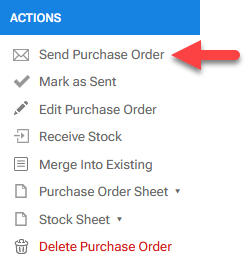
- Click Send Purchase Order to send the purchase order to the supplier.
- Select the method for sending the purchase order.
- SmartPO Direct Send: Send purchase order directly to the supplier's ordering system
- Email: Send purchase order via email
- Click send.
Still have questions? Use the Search Tool at the top of the page to find more related guides. Need help? Click the icon to submit a support ticket – our Client Services team is ready to assist!
Comments
0 comments
Please sign in to leave a comment.