
This article explains how to configure the General settings for each decoration process in DecoNetwork. These settings control how a decoration method behaves in your storefront and production workflow, including naming, quantity rules, color limits, file types, and process compatibility.
In this article
- Prerequisites
- Why these settings matter
- Step 1: Access General settings
- Step 2: Configure process identification (all processes)
- Step 3: Set quantity and order controls (all processes)
- Step 4: Configure design types and color limits (all process except embroidery)
- Step 5: Configure embroidery color limits
- Step 6: Configure screen printing color limits
- Step 7: Configure allowed file formats (all process except embroidery)
- Step 8: Configure process mixing (all processes)
- Best-practice tips
- Troubleshooting
- FAQs
- Additional Resources
Prerequisites
- You have Admin access to your DecoNetwork account
- At least one decoration process is enabled
Why these settings matter
The General settings define the core behavior of a decoration process, including what customers can select, what artwork is accepted, and how orders flow into production.
- Reduce rework: Prevent incompatible artwork and file types from entering production.
- Protect profitability: Enforce minimum quantities for processes with setup overhead.
- Set clear expectations: Match storefront options to what you can reliably produce.
- Improve consistency: Standardize rules across user-uploaded and stock designs.
Step 1: Access General settings
- Log into your DecoNetwork Website.
-
Go to Admin → Decoration Processes.

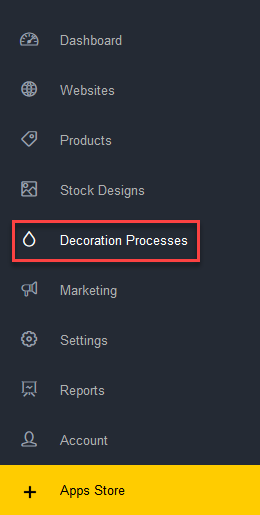
-
Select the decoration process you want to configure (for example, DTG or Screen Printing).
-
Open the General tab.
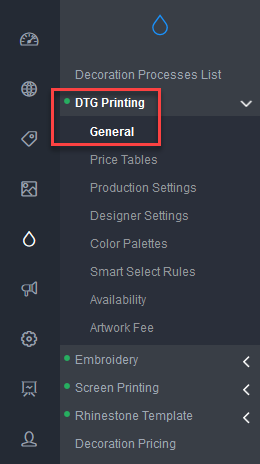
The general settings for your selected decoration process will be shown in the main work area.
Step 2: Configure process identification (all processes)
These settings control how the process appears to customers and staff across the system.
Process Name
This is the label shown in storefronts, quotes, orders, and production areas.
- Why this exists: Lets you use business-friendly names that match how you sell the service.
- Benefit: Improves customer understanding and reduces selection mistakes and speeds up internal job recognition.
Tick the Rename process checkbox to enable editing of the process name in the Name box.
Process abbreviation
A shorter label used where space is limited (for example, production screens and reports).
- Why this exists: Keeps process labels readable in compact layouts.
- Benefit: Helps production teams scan faster production queues and reduces UI clutter.
Tick the Rename abbreviation checkbox to enable editing of the process abbreviation in the Abbreviation box.
Process description
Short text that helps customers understand what the process is and when to choose it . The process description appears in the Select Process popup on the Design-On-Product page and in the Select Type of Design popup in the Online Designer.
- Why it exists: Lets you add customer-friendly guidance specific to your shop (for example, “Best for small runs” vs “Best for solid spot colors”), to help customers choose the right method, reducing order changes later.
- Benefit: Reduces confusion during design/ordering and lowers pre-sales questions.
Tick the Rename description checkbox to enable editing of the process description in the Description box.
Step 3: Set quantity and order controls (all processes)
These settings enforce order rules that protect your workflow and profitability.
Minimum quantity
Sets the minimum number of items required to use this process on an order.
- Why this exists: Some processes have setup overhead (for example, screen setup) and are not cost-effective for very small runs.
- Benefit: Prevents unprofitable orders and reduces manual intervention.
Setup Guidelines:
- Set to 1: Supports one-off personalization and samples (common for DTG).
- Set higher (e.g., 12+): Protects profitability where setup costs are significant (common for Screen Printing).
Step 4: Configure design types and color limits (all process except embroidery)
These settings control what artwork is allowed, and how many colors can be used.
Settings for Screen Printing.
Settings for DTG Printing, Sublimation, Transfer, Rhinestone, DTF Printing, and UV Printing.
Permitted Design Types
-
Option: Raster
- Why it exists: Enables photo-based or pixel artwork from your stock design library.
- Benefit: Supports photographic/gradient-heavy designs (commonly used for DTG, Sublimation, DTF, UV).
- Consideration: Raster art can lose quality if scaled up; ensure your workflow checks resolution.
-
Option: Vector
- Why it exists: Enables scalable artwork that’s ideal for clean edges and separations.
- Benefit: Better for spot-color work (especially Screen Printing) and produces crisp results at any size.
- Consideration: Vector art is usually easier to recolor and separate for production.
Design color types allowed
Design color types allowed: This setting is only available for DTG Printing, Sublimation, Transfer, and Rhinestone Template. It allows you to choose whether Full Color or Low Color designs are allowed to be used for these decoration processes.
-
Option: Full Color
- Why it exists: Allows designs with unlimited colors (including gradients and photographic color).
- Benefit: Maximizes creative freedom and supports processes designed for full-color output (DTG, Sublimation, DTF, UV).
- Trade-off: Not appropriate for spot-color pricing models unless you are confident your pricing handles complexity.
-
Option: Low Color
- Why it exists: Restricts designs to a limited number of flat colors to match spot-color workflows.
- Benefit: Keeps pricing predictable and reduces production complexity (especially for Screen Printing and some Transfer workflows).
- Best for: Shops that charge by color, screen, or separation complexity.
Maximum number of colors for Low Color designs
Maximum number of colors for Low Color designs: This setting allows you to set the maximum number of colors allowed in the designs used for the selected decoration processes. Designs with more colors will not be displayed or loadable in the front-end stores or Business Hub to be used as decoration on a product. This setting will not be available for DTG Printing, Sublimation, Transfer, or Rhinestone Template if Full Color is selected as the design color type allowed.
-
Option: Select a maximum color count (dropdown/field)
- Why it exists: Sets an explicit limit for “Low Color” designs.
- Benefit: Prevents orders that exceed your practical or priced-for capacity (fewer surprises at production time).
-
Setup Guidelines:
- 1–2 colors: Fast production, lower costs, simpler separations.
- 3–5 colors: Balanced flexibility and control for typical spot-color jobs.
- 6+ colors: Greater design flexibility but higher risk of mispricing/time overruns.
Allow gradients in low color vector designs?
-
Option: Allow gradients in low color vector designs (checkbox)
Allow gradients in low color vector designs? (assumes you will convert files to halftones): When the checkbox is ticked, gradients will be allowed in color-reduced vector designs, but the assumption for handling this is that production staff will manually reduce the gradient to halftones. This setting is only available for DTG Printing, Sublimation, Transfer, and Rhinestone Template if Low Color is selected as the design color type allowed. This setting is enabled by default.
- Why it exists: Allows “gradient-style” artwork even when you prefer low-color rules, assuming you will convert gradients to halftones.
- Benefit: Supports more modern designs while keeping a “low-color” pricing mindset.
- Use when: Your workflow routinely converts gradients to halftones and you want to accept that style of design.
- Leave off when: You want truly flat spot colors only (strict separation control).
Step 5: Configure embroidery color limits
Limit embroidery clipart colors
This setting lets you specify the maximum colors allowed for user-uploaded embroidery designs and for stock designs from the embroidery clipart library. Availability of embroidery stock designs will be limited to those that meet the maximum number of colors criteria.
-
Option: Max colors allowed (number field)
- Why it exists: Prevents embroidery clipart uploads that exceed your machine or workflow limits.
- Benefit: Reduces thread changes, machine downtime, and unexpected digitizing complexity.
-
Setup Guidelines:
- Match your machine head capacity: Set it to the number of needles/colors you can run without manual swaps.
- Set lower for efficiency: Fewer colors = faster runs and more consistent scheduling.
Step 6: Configure screen printing color limits
The settings in this section let you specify the maximum colors allowed for user-uploaded designs and for stock designs from the decoration library. Stock designs that exceed the maximum number of colors specified will not be available in the storefront and in Business Hub for the screen printing decoration process.
Number of Colors
-
Option: Max colors allowed (dropdown)
Max colors allowed: This setting allows you to set the maximum number of colors allowed in the designs that customers upload for screen printing. User-uploaded images that exceed the maximum will be reduced to the maximum color limit.
- Why it exists: Sets the maximum color count accepted for screen-printed designs.
- Benefit: Prevents designs you can’t (or don’t want to) produce and keeps pricing aligned to screen count.
-
How to choose:
- 1–2: Fast, budget-friendly, simple setups.
- 3–5: Common spot-color range with manageable complexity.
- 6+: Higher complexity; ensure your pricing/timeframes scale accordingly.
-
Option: Default “Max colors for decoration library” to “Max colors allowed” (checkbox)
Default 'Max colors for decoration library' to 'Max colors allowed': Tick this checkbox if you want the maximum colors allowed for designs from the decoration library to be made available for screen printing to default to the maximum colors allowed specified for user-uploaded designs.
- Why it exists: Keeps your stock design library limits consistent with the max colors you accept overall.
- Benefit: Fewer “why can I choose this stock design but not upload similar art?” moments—more consistent customer experience.
- Use when: You want one simple rule across uploads and stock designs.
-
Option: Max colors for decoration library (field)
Max colors allowed for decoration library: This setting allows you to set the maximum number of colors allowed for stock designs from the decoration library that can use screen printing. Stock designs for screen printing will be limited to those that do not exceed the maximum colors allowed in the storefront and in Business Hub.
- Why it exists: Lets you set a separate max color limit for stock designs specifically.
- Benefit: Allows you to curate easier-to-produce stock art even if you accept more colors for uploaded art (or vice versa).
- Use when: You want tighter control over what customers can browse/select in the stock design library.
-
Option: Allow gradients in low color vector designs? (checkbox)
Allow gradients in low color vector designs? (assumes you will convert files to halftones): When this checkbox is ticked, gradients will be allowed in color-reduced designs uploaded for screen printing, but the assumption for handling this is that production staff will manually reduce the gradient to halftones. This setting is enabled by default.
Prior to V8.510, grayscale images were not supported for screen printing when this setting was enabled. Grayscale images are now supported following an improvement made in V8.510. In order for the support of grayscale images to take effect, the general settings for the screen printing process need to be re-saved.
- Why it exists: Allows gradient-style effects in a spot-color workflow, assuming halftone conversion.
- Benefit: Supports more modern artwork styles while still controlling the number of “spot colors” used for pricing and setup.
- Leave off when: You only want flat spot colors (strict separation workflows).
Step 7: Configure Allowed File Formats (all process except embroidery)
These options control which customer-uploaded file formats are accepted for the process.

-
Option: Allow All File Formats (checkbox)
When selected, all available file formats are permitted across all areas, regardless of the individual checkboxes below. If unchecked, only the selected formats will be allowed.
- Why it exists: Quickly removes file-type restrictions for maximum upload flexibility.
- Benefit: Reduces customer upload friction and helps capture more orders (especially for consumer-facing stores).
- Trade-off: Increases the chance of unsupported/low-quality artwork that requires manual conversion.
-
Option: Select specific allowed formats (when "Allow All File Formats" is off)
Each file format can be enabled or disabled for specific areas of the platform. If a checkbox is selected, the format is permitted in that area. If unselected, users will not be able to upload or use that file type in that specific context.
- Why it exists: Lets you accept only the formats you can reliably process.
- Benefit: Higher “first-time-right” production and less rework (fewer file conversions, fewer errors).
-
Recommended approach:
- Vector-friendly workflows: Prefer vector formats for clean separations and scaling.
- Photo/full-color workflows: Allow common raster formats that match your RIP/print workflow.
Step 8: Configure Process Mixing (all processes)
These settings control whether a process can be used together with other decoration methods on the same product.
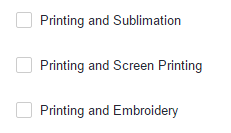
-
Option: Enable mixing with selected processes (checkboxes)
- Why it exists: Allows multi-decoration designs on the same product (where your workflow supports it).
- Benefit: Increases order value and flexibility (for example, embroidery + print combinations) while keeping combinations intentional.
- Best use: Enable only combinations you can actually produce without confusion or mispricing.
-
Option: Leave mixing disabled (no boxes checked)
- Why it exists: Prevents incompatible or hard-to-quote combinations.
- Benefit: Simplifies ordering and production, reduces quoting complexity, and avoids unexpected multi-process jobs.
Best-practice tips
- Match limits to capability: Set color limits based on what your equipment and team can consistently produce.
- Keep descriptions simple: Use benefit-focused wording customers understand.
- Be cautious with gradients: Disable gradients if they commonly require manual conversion.
- Protect profitability: Use minimum quantities for processes with setup overhead.
- Enable mixing intentionally: Only allow process mixing when you have a proven combined-process workflow.
- Test before going live: Place a test order in your storefront to confirm the customer experience matches your rules.
Troubleshooting
Customers cannot upload artwork
- Confirm the design type is enabled for the process.
- Check your file format restrictions and ensure common formats you accept are enabled.
Orders are blocked due to minimum quantity
- Review the Minimum Quantity setting.
- Lower the minimum if you want to allow smaller runs for this process.
Artwork colors are being reduced or rejected
- Review the Number of Colors limits for User Uploaded Designs and Stock Designs.
- Increase the limit only if your production process can handle the additional colors reliably.
FAQs
Do all decoration processes have the same General settings?
Yes. All decoration processes share the same core General settings. Some processes (such as Embroidery and Screen Printing) may include additional process-specific options.
What happens if I disable gradients?
Customers will not be able to use gradient effects in low-color vector artwork for this process, which reduces manual artwork conversion for methods that do not reproduce gradients reliably.
Can I change these settings later?
Yes. Changes typically apply to future orders and may affect storefront behavior immediately. If you make major changes, consider placing a test order to confirm the customer experience.
Should I use the same settings for all processes?
Not usually. Configure each decoration method based on your production capability, equipment limitations, pricing strategy, and the customer experience you want to offer.
Additional Resources
- Decoration Processes - Overview
- Color Palettes - All Decoration Processes
- Artwork Fee - All Decoration Processes
Still have questions? Use the Search Tool at the top of the page to find more related guides. Need help? Click the icon to submit a support ticket—our Client Services team is ready to assist!
Comments
0 comments
Please sign in to leave a comment.