This article explains how to create a custom product image template with dynamic recoloring in DecoNetwork. While DecoNetwork stores can be quickly populated using catalog products – drawing from a database of over 16,000 items from 18 major wholesale suppliers, complete with detailed descriptions, sizes, and color views – you also have the flexibility to create your own custom products when needed. The step-by-step guide below shows you how to build a PSD template with correctly named layers, upload it to your product, and verify that dynamic recoloring works across all views (e.g., front, back, and side). This eliminates the need to generate separate images for each product color, saving time and streamlining your setup.
In this article
- Prerequisites
- Why Use This Feature
- Step 1: Prepare your source image
- Step 2: Separate recolorable vs. non-recolor elements
- Step 3: Convert recolor layers to 50% gray
- Step 4: Name your layers correctly
- Step 5: Save your template
- Step 6: Upload the template to your product
- Step 7 (Optional): Add decoration areas
- Best-Practice Tips
- Troubleshooting
- FAQs
- Additional Resources
Prerequisites
- Graphics app installed (e.g. Adobe Photoshop or Corel PHOTO-PAINT). GIMP can also be used.
- High-resolution, front/side/back product images with a transparent background.
- Square canvas at least 600 × 600 px (larger recommended for quality).
Why Use This Feature
Dynamic recoloring lets you upload a single PSD template and automatically render all color variants for a product. This reduces image production time, keeps visuals consistent across your sites, and ensures customers see accurate previews for every color without you managing separate files per variant.
- Scale faster: Add new colors without making new images.
- Consistency: One master template drives all store/product views.
- Accuracy: Layer masking preserves non-recolor details (e.g., labels, buttons).
- Lighter ops: Fewer assets to track, update, and QA.
Step 1: Prepare your source image
- Open your best, straight-on product photo in your graphics application.
- Crop the image, leaving about 15–20 px space from the edges.
- Set the canvas to a square (minimum 600 × 600 px) with a transparent background.
- Remove any solid background from the product image.
Step 2: Separate recolorable vs. non-recolor elements
- Cut non-recolor parts (e.g., label, collar, buttons) to their own layer(s).
- If multiple areas can change color (e.g., body vs. sleeves), separate them into different layers.
Step 3: Convert recolor layers to 50% gray
- Create a small rectangle filled with 50% gray (RGBA 128, 128, 128) to use as a reference block.
-
Select each recolor layer and convert to black & white, then adjust levels so it matches the 50% gray reference.
Note: If you convert the image to black and white by using grayscale mode, you will need to set the image mode back to RGB color mode prior to saving the file.
If you are using PhotoShop, select Image > Mode > RGB Color.
If you are using Corel PHOTO-PAINT, select Image > Convert to > RGB color (24 bit).
If the gray of the product does not closely match the gray of the reference block, adjust the color channels so that the product gray more closely matches the reference block gray.
- Delete the gray reference block when finished.
If you switch the image to Grayscale mode to desaturate, be sure to switch back to RGB (Image → Mode → RGB Color) before saving, or recoloring won’t work correctly.
Step 4: Name your layers correctly
-
Name the layer that should be recolored: color_1.
If the product has multiple color layers, name them: color_1, color_2... etc consecutively.
- Name non-recolor layers descriptively (e.g., label, collar, details).
It is important that you follow this naming convention so that the system can recognize which areas of the product are recolorable.
Step 5: Save your template
-
Save the image as a PSD file.
Step 6: Upload the template to your product
- Log into your DecoNetwork Website.
-
Browse to Admin → Products.
Admin Button
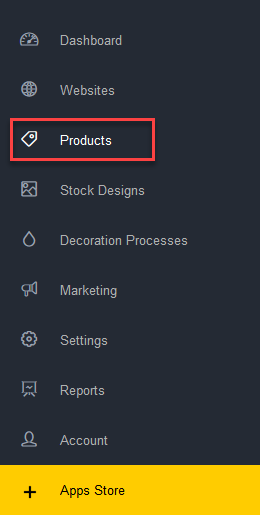
Products Menu Item
-
Press Add Product, then select Add Custom Product.

Add Custom Product Menu Item
The main work area contains the settings for configuring the identifier information for the new custom product:
- Product Group - select a product group from the dropdown menu. Product groups allow you to set default behaviors for groups of products. They save you from having to configure common settings for products individually.
- Product Name - give your product a name.
- Product Code - if you use a code to store and record your product, enter it here.
- Number of colors is the number of color areas that can be changed on the product.
- Enter the product identifier information.
-
Click Save.
Once the basic product identifier information is entered, the next task will be to configure views of the product that appear in the online store and in the Designer.
-
Select a product view option:
Create Virtual Sample Popup
- Select Your own custom template.
- Click Next.
-
Click on Browse... or Choose File (depending on your browser).
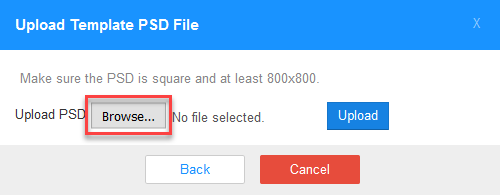
Upload Template PSD File Popup
- Find and select the PSD file you created and click Open in the File Upload dialog.
- Click Upload in the Upload Template PSD File popup.
-
Click on the Select color button.
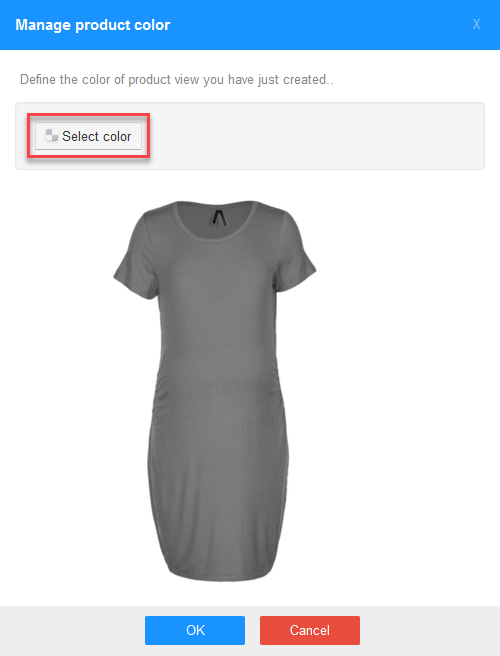
Manage Product Color Popup
-
Set a default color for the product.
You can select from pre-defined generic colors, manufacturer-defined colors, or define your own custom color by clicking on the Define new color button.
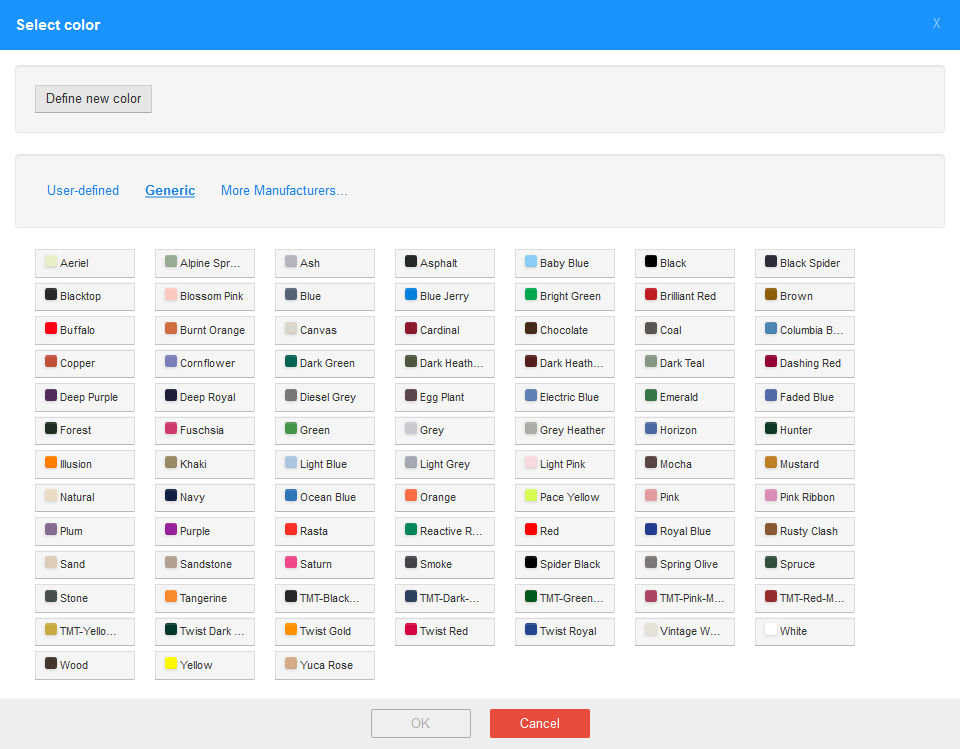
Select Color Popup
- Click OK.
-
Enter a name for the product view.
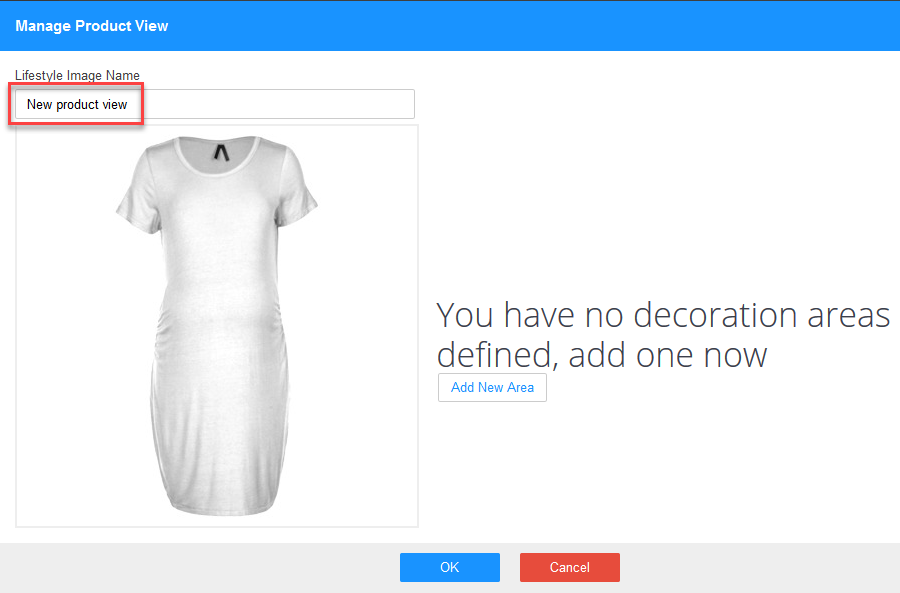
Manage Product View Popup
Step 7 (Optional): Add decoration areas
-
Define decoration areas for the view if needed (e.g., front chest, back, sleeve).
See the section, "To add a decoration area", in the help article, "Product Decoration Area", for instructions on how to add decoration areas.
-
Click OK.
You can now continue with configuring the product, including configuring additional views. See the help articles under Product Management in the menu at the left of this page for more information about configuring a product.
- Save and repeat for additional views (side/back) as required.
Best-Practice Tips
- Keep recolor layers on Normal blend mode with full opacity; avoid effects that distort recolor results.
- Mask carefully around edges to prevent halos when colors lighten/darken.
- Maintain a consistent camera angle and image scale across all views.
- Store a master PSD per product with clear layer names and notes.
- Test extreme colors (e.g., white/black/neon) to validate shading quality.
Troubleshooting
- Recolor doesn’t apply: Ensure layers are named color_1, color_2, etc., and file is in RGB mode.
- Colors look flat or off: Confirm recolor regions are ~50% gray; re-check levels against a 50% gray reference.
- Unwanted parts recolor: Move those details to a separate, non-recolor layer and mask cleanly.
- PSD upload issues: Avoid very large dimensions/layer effects; simplify smart objects if necessary.
- Default color not showing: Set a default via Select color in the view setup.
FAQs
-
Why 50% gray?
It provides a neutral luminance baseline so tints/shades render predictably across color choices. -
How many recolor layers can I use?
Multiple are supported (color_1, color_2, …). Keep each region distinct for best results. -
Do I need separate images per color?
No – dynamic recoloring generates variant images from your single PSD. -
Can I use GIMP?
Yes. Follow the same principles: RGB mode, 50% gray recolor layers, correct naming. -
Recommended size?
At least 600 × 600 px; larger source images yield crisper results.
Additional Resources
- Add Custom Product
- Configuring Product Views & Assigning Decoration Areas
- Product Colors
- How to Configure a Custom Product Using an Image Per Color
- Required Files for Importing Products
Still have questions? Use the Search Tool at the top of the page to find more related guides. Need help? Click the icon to submit a support ticket—our Client Services team is ready to assist!
Comments
0 comments
Please sign in to leave a comment.