
The Blank Product Display settings control how blank products appear throughout your website storefront, including whether blank products can be viewed, purchased, and how pricing, color, and size information is displayed to customers. These settings influence the customer browsing experience across product listings, product pages, and the Online Designer.
Properly configuring blank product display settings helps guide customer purchasing behavior while ensuring your storefront experience aligns with your business model and fulfillment workflow.
In This Article
- Why configure Blank Product Display settings?
- Prerequisites
- Step 1: Open the Blank Product Display settings
- Step 2: Configure blank product options
- Step 3: Configure product display options
- Step 4: Configure pricing display options
- Step 5: Configure thumbnail display options
- Step 6: Configure color display options
- Step 7: Configure size display options
- Step 8: Save your settings
- Best-Practice Tips
- Troubleshooting
- FAQs
- Additional Resources
Why configure Blank Product Display settings?
Blank Product Display settings act as business instructions the system remembers and applies throughout the storefront workflow. These settings determine how customers interact with blank products before customization, influencing browsing behavior, purchasing decisions, and product visibility across the website.
- Control whether customers can purchase blank products.
- Manage how blank product pricing appears on storefront product listings and product pages.
- Provide a clearer browsing experience for customers comparing products.
- Support different sales models for fulfillment centers and affiliate stores.
- Control how storefront product information progresses into the Online Designer and checkout workflow.
Prerequisites
- You must have administrator access.
- You must have products published to your website.
- You should have pricing configured for your products.
Step 1: Open the Blank Product Display settings
- Log into your DecoNetwork Website.
-
Browse to Admin → Products.
Select Blank Product Display.
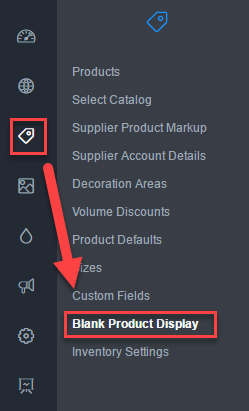
The main work area displays your present blank product settings.
Click the image to enlarge.
Step 2: Configure blank product options
-
Configure whether customers can purchase blank products.
-
Allow blank product purchase: lets you choose to enable or disable the ability to buy blank products from online stores. Business Hub operators are not affected. If No is selected, products cannot be added to cart without decoration. If Yes is selected, these additional options will be available for you to configure:
-
Show 'Add to cart' button: lets you choose whether to automatically display the 'Add to cart' button in product display listings and the view blank product page.
Blank product prices remain visible on website product listings and product pages even when blank product purchasing is disabled.
Improvement implemented in V8.611.This allows customers to continue viewing pricing information while browsing products, even if your storefront workflow requires decoration or customization before purchase.
- Allow stores to customize this setting for their own site: tick this checkbox to allow affiliate store owners to customize the availability of the 'Add to cart' button on their own site. When the checkbox is ticked, the "Show Add to Cart Button" setting will be enabled in the View Blank Product widget.
-
Restricting blank product purchasing can help guide customers toward decorated product workflows while still allowing them to browse product catalogs and pricing information. -
Allow blank product purchase: lets you choose to enable or disable the ability to buy blank products from online stores. Business Hub operators are not affected. If No is selected, products cannot be added to cart without decoration. If Yes is selected, these additional options will be available for you to configure:
Step 3: Configure product display options
-
Go to the product display options.
- Configure how products are displayed.
-
Product display option lets you choose how a product will load when the product thumbnail is clicked in a store.
- Product details page: displays the details page for the product.
- Designer with the cheapest decoration process: loads the product in the Designer with the cheapest decoration process set as the process to use.
- Designer with the cheapest decoration process on first area selected: loads the product in the Designer with the cheapest decoration process set as the process to use on the first area selected.
- Designer with no decoration process: loads the product in the Designer with no decoration process selected.
- Allow stores to customize this setting for their own site: tick this checkbox to allow affiliate store owners to customize the product display options on their own site.
-
Product display option lets you choose how a product will load when the product thumbnail is clicked in a store.
Step 4: Configure pricing display options
-
Go to the pricing display options.
- Configure how blank product pricing should appear on storefront product listings and product pages.
-
Price types to display lets you set what is included in the prices displayed in stores for a blank product listing.
- Options are:
- Decoration pricing only: displays only the total decorated product price (blank plus decoration) for each available decoration process.
- Blank product pricing only: displays the price of the blank product only.
- Both decoration and blank product pricing: displays the prices for both the blank product and the price of the decoration service for each available decoration process.
-
Allow stores to customize this setting for their own site: tick this checkbox to allow affiliate store owners to customize the pricing type display options on their own site.
If this checkbox is ticked, you will be able to change this setting at the store level via the Show prices for option in the Blank Product Listing Widget Properties.
Click here for instructions on how to edit the properties of the Blank Product Listing Widget.
- Options are:
-
Price levels to display lets you set which price level will be displayed in stores for a blank product listing.
- Options are:
-
As low as (cheapest unit price including quantity discounts):displays the best possible unit price for the product, taking into consideration the highest quantity volume discount level.
Price display example
-
Starting from (unit price for minimum quantity): displays the unit price of the product for the minimum quantity that can be purchased.
Price display example
-
Both 'as low as' and 'starting from': displays both the best possible price for the highest quantity and the unit price for the minimum quantity.
Price display example
-
-
Allow stores to customize this setting for their own site: tick this checkbox to allow affiliate store owners to customize the pricing level display options on their own site.
If this checkbox is ticked, you will be able to change this setting at the store level via the Price level display option in the Blank Product Listing Widget Properties.
Click here for instructions on how to edit the properties of the Blank Product Listing Widget.
- Options are:
-
Price types to display lets you set what is included in the prices displayed in stores for a blank product listing.
Step 5: Configure thumbnail display options
-
From the Default thumbnail image dropdown, select the image to use for your product listing.
-
Default thumbnail image lets you set which uploaded product image will be used for the product thumbnail.
- Sales Image 1: the first image uploaded as the sales image for the product in the product's configuration.
- Product Image 1: the first image uploaded as the product information image for the product in the product's configuration.
-
Default thumbnail image lets you set which uploaded product image will be used for the product thumbnail.
Step 6: Configure color display options
-
Go to the color display options.
- Configure how product colors are displayed.
-
Default color sort order lets you choose how product colors are sorted by default.
- Alphabetically: sorts product colors by name alphabetically.
- By Hue: sorts product colors by hue. Products are grouped into families of pure colors (i.e., red, blue, green, yellow, orange) and sorted by shade from darkest to lightest.
-
Default color sort order lets you choose how product colors are sorted by default.
Step 7: Configure size display options
-
Go to the size display options.
- Configure how sizes are displayed.
-
Multiple sizes display: lets you set how multiple sizes are displayed for products that support them.
-
Show 'Add Size' option: displays a size drop-down with a quantity field and also an 'Add Another Size' option which adds size and quantity fields, allowing the customer to specify additional sizes.
-
Show all available sizes: displays quantity fields for all available sizes at once.
-
-
Size variant display: lets you choose how sub-sizes are displayed on your site.
- Show size variants in table: displays the sub-sizes in a table format.
- Show size variants in rows: displays sub-sizes in individual rows.
-
Products set to Default Size: lets you choose whether or not you want products to be initially set to the default size when loaded in the Designer.
When this option is set to "No", new order line items in Business Hub will not have a default pre-set size or quantity.
-
Size Name Display: lets you choose what to display for the size name in the storefront.
- Show size code: displays the size code, e.g. XL
- Show size name: displays the size name, e.g. X-Large
-
Multiple sizes display: lets you set how multiple sizes are displayed for products that support them.
Step 8: Save your settings
- Click Save.
- Open your storefront and test product listings and product pages to confirm the display behavior matches your intended customer experience.
Troubleshooting
Blank product prices are not visible
- Confirm pricing has been configured for the product.
- Review the pricing display settings on the Blank Product Display page.
- Check whether the product is visible on the storefront.
Customers cannot purchase blank products
- Verify that blank product purchasing is enabled.
- Confirm the product is active and published to the storefront.
FAQs
Can blank product prices be displayed if blank purchasing is disabled?
Yes. Blank product prices can still appear on storefront product listings and product pages even when customers are not allowed to purchase blank products.
Do these settings affect the Online Designer?
Yes. Blank product display settings influence how customers progress from storefront browsing into the Online Designer workflow.
Should fulfillment centers and affiliate stores use the same settings?
Not necessarily. Different storefronts may require different blank product visibility and pricing strategies depending on their sales model and customer workflow.
Additional Resources
Still have questions? Use the Search Tool at the top of the page to find more related guides. Need help? Click the to submit a support – our Client Services team is ready to assist!
Comments
0 comments
Please sign in to leave a comment.