
In many cases, businesses offer unique products that aren't listed within any existing supplier catalog – perhaps custom designs, exclusive creations, or made-to-order items tailored to niche markets. DecoNetwork recognizes this need and empowers you to construct and manage such products from the ground up. With just administrator access, you can define each product's core attributes and visual presentation, giving you full control over how these custom offerings appear both behind the scenes and in your online store.
In this article
- Prerequisites
- Why Use This Feature
- Step 1: Start a custom product
- Step 2: Enter basic product details
- Step 3: Configure the product views
- Best-Practice Tips
- Troubleshooting
- FAQs
- Additional Resources
Prerequisites
- Administrator or staff account with permission to manage products.
- Product fundamentals: name, SKU/product code, category/brand.
- Product images prepared (ideally one per color and per view).
- Decoration method plan (e.g., DTG, screen print, embroidery) and print-area dimensions.
- Pricing approach (base price, decoration charges, size upcharges).
Why Use This Feature
Not every item you sell exists in an integrated supplier catalog. Custom products let you list in-house items, bundles/kits, or niche blanks while keeping storefront presentation and production workflows consistent. Benefits include:
- Sell anything: Offer unique SKUs not provided by catalog suppliers.
- Full control: Define your own views, images, sizes, colors, and decoration areas.
- Consistent production: Map accurate print/embroidery areas to reduce rework.
- Pricing flexibility: Set base/decoration pricing and size upcharges to protect margin.
- Scalable management: Clone and adapt custom products for similar items.
Step 1: Start a Custom Product:
- Log into your DecoNetwork Website.
-
Browse to Admin → Products.
Admin Button
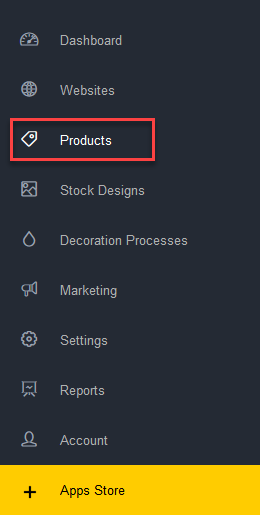
Products Menu Item
-
Click Add Product, then select Add Custom Product.
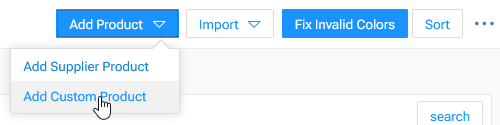
Add Custom Product Menu Item
The main work area contains the settings for configuring a new custom product:
Click the image to enlarge.
Step 2: Enter basic product details
- Enter the following production details:
- Product Group - select a product group from the dropdown menu. Product groups allow you to set default behaviors for groups of products. They save you from having to configure common settings for products individually.
- Product name - Enter a Product Name customers will recognize (e.g., “11oz Ceramic Mug”).
-
Product code - Set a unique Product Code/SKU (e.g.,
MUG11-WHT). - Number of colors - Enter the number of color areas that can be changed on the product
-
Click Save to create the product
Once the basic product identifier information is entered, the next task will be to specify views of the product that appear in the online store and in the designer.
Step 3: Configure the product views
-
Select a product view option:
Create Virtual Sample Popup
- Upload a different image for each product color - if you cannot make a PSD template, or would prefer extreme color accuracy, consider this option which is to upload a separate image for each available color.
- Upload a single image to display for all product colors - upload an image that will represent all product colors and cannot change to reflect the user's selection.
- DecoNetwork dynamically colorizing template - use an existing template image. Images for each color added to the product will be automatically created.
- Upload a dynamically colorizing template - upload your own custom PSD template which will be used to automatically generate images for each color added to the product. (For instructions on how to create your own custom template, see the How Do I... Create a Custom Product Image Template with dynamic recoloring help article).
- Do not use a product image - choose this option to not display an image if an image is not available or cannot be sourced.
- Depending on your choice in the previous step, you will have to either select a product image or upload an image or images. If you have uploaded or used a template file or image series, you will also have to choose a default color (or colors) for the product.
- Once the product view image has been configured, decoration areas must be defined. You may be able to select from a series of predefined decoration areas if suitable, otherwise, you may define your own. Chosen decoration areas must be dragged into the appropriate location on the product image so that selected decorations are applied to the correct place on the product.
-
When done, click Save.
You will now be taken to the regular product configuration page with the data you have entered already in place. Although the product is in DecoNetwork, it is not yet configured. At a minimum, it will need pricing if you wish to make the item saleable. Pricing is located in the inner menu of your product view.

Product Configuration Page
Ultimately, the amount of information you enter into the product is up to you. For more information, see the Products Overview article for details of all available configuration options.
Best-Practice Tips
-
Choose a consistent naming and SKU pattern: Use product names customers will recognize and keep your Product code (SKU) consistent across similar items (for example:
MUG11-WHT,MUG11-BLK) to simplify searching, reporting, and production handoffs. - Start with a “template-style” product group: Use Product Group defaults to standardize common behaviors (pricing rules, decoration defaults, workflows) so new custom products require fewer manual adjustments.
- Pick the right view strategy for accuracy vs effort: Use Upload a different image for each product color when color accuracy is critical, and use a dynamically colorizing template when you want faster scaling across many colors.
- Use consistent image dimensions across views: Export product images with the same aspect ratio and padding for each view (front/back/side) to avoid stretched previews and misaligned decoration placement.
- Define decoration areas like a production spec: Name areas clearly (e.g., Left Chest, Full Front, Back Yoke) and align them precisely on the product image so artwork lands in the right place in the designer and in production.
- Validate every variant before going live: If the product has multiple colors, sizes, or views, confirm each combination has the correct image mapping, decoration areas, and pricing so customers don’t hit add-to-cart blockers.
- Set pricing immediately after creating views: After saving the product views, go straight to pricing in the product’s inner menu and confirm base and decoration charges (and any size upcharges) are set for all variants.
- Clone for speed and consistency: Once you’ve built one strong custom product, clone it for similar items (same view structure and decoration areas) and only swap the images, colors, and SKU details.
Troubleshooting
- Product not visible in store → Check Visibility/Status and store assignment.
- Decoration options missing → Ensure methods are enabled globally and on each decoration area.
- Images look stretched → Re-export views with consistent aspect ratios and re-upload.
- Colors not switching images → Verify each color has an image mapped for every view.
- Can’t add to cart → Confirm base and decoration pricing are set for all variants.
FAQs
-
What’s the difference between supplier products and custom products?
Supplier products sync catalog data automatically; custom products are fully defined by you. -
Can I import custom products in bulk?
Yes – use product import for faster setup, then refine images/areas as needed. -
How many decoration areas can I add?
As many as your workflow requires – keep names clear and production-ready. -
Can I restrict a custom product to specific stores?
Yes – use product visibility/store assignment. -
Do I need image-per-color?
No, but it greatly improves accuracy for shopper previews.
Additional Resources
Still have questions? Use the Search Tool at the top of the page to find more related guides. Need help? Click the icon to submit a support ticket—our Client Services team is ready to assist!
Comments
0 comments
Please sign in to leave a comment.