
DecoPay is DecoNetwork’s embedded payment system, powered by Stripe. Unlike traditional payment gateways that rely on an external processor, DecoPay brings payments in-house with payment solutions built directly into the DecoNetwork platform.
Note: Testing Mode is available for DecoPay. This lets you safely test your checkout and payment workflows before processing live transactions. DecoPay Testing Mode will be operational while your system is in Testing Mode after you have configured DecoPay with your personal details and successfully verified your identity.
If you are an existing customer and already have an external payment gateway configured, your current payment gateway will remain active.
If you are a new customer and wish to integrate with an external payment gateway currently supported in DecoNetwork, you can do so by enabling the Payment Gateways app. Note, that payments processed through non-DecoPay gateways will be subject to transaction fees. View the Enable External Payment Gateway Integrations help article for instructions.
In this article
- Prerequisites
- Why use DecoPay
- Set up DecoPay
- Configure DecoPay
- View payouts
- View transactions
- Manage disputes
- Update your bank account details
- Best-practice tips
- Troubleshooting
- FAQs
- Additional Resources
Prerequisites
- You must have Administrator access.
Why use DecoPay
DecoPay provides the benefits of embedded payments, including:
- Faster setup – get up and running quickly with built-in payments, eliminating the need for separate gateway configurations.
- Improved customer experience through a more seamless payment process
- Faster payment collection and access to funds – payout speed, in most cases, is 2-3 days after a sale has been made and cleared funds are scheduled to be deposited into your account daily.
- More payment method options without having to open separate merchant accounts with each provider. In addition to credit cards, you can also choose to accept digital wallet payments, bank transfers, ACH debit, and installment payment options (such as Afterpay and Klarna)
- Centralized transaction management – manage transactions without logging into a separate platform
- Dispute management inside DecoNetwork – respond to disputes with real-time alerts and avoid penalties associated with forced refunds.
- Detailed transaction history
- No extra transaction fees – keep costs down with in-platform payments; external payment gateways incur additional fees.
- Easily obtainable transaction reports – use the Export feature to download filtered transaction records
Setup DecoPay:
If you are a new sign-up and skipped the DecoPay setup step during the signup process, you will need to complete this step to enable DecoPay. If you are an existing customer and already have an integrated payment gateway setup, you will also need to complete this step if you want to use DecoPay as your current payment gateway.
- Log into your DecoNetwork Website.
-
Browse to Admin → Settings.
Select Payment Methods.

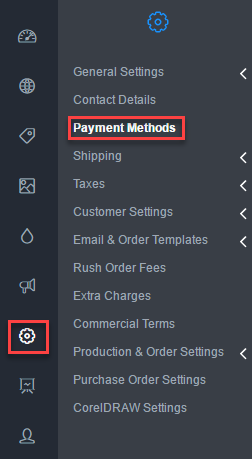
The Payment Methods page will be displayed. The DecoPay option will be displayed in the top panel, followed by alternative payment methods in the next panel, then currently configured manual payment methods in the bottom panel.
Click the image to enlarge.
-
Click on the Signup button.
You will be prompted to choose a business type.
-
Select a business type and click OK.
You will be taken to the Stripe application process.
-
Complete the Stripe application.
The Stripe application consists of the following parts:
- Contact Details - Enter your contact details and enter the verification code when prompted.
- Business Information - Enter your business identification details.
- Personal Details - Enter the personal details (to be completed by the principal owner of the business or authorized personnel). Identification details will need to be provided for verification.
- Business Owners - Enter the contact details of additional business owners who own 25% or more of the business.
-
Account for Payouts - Enter the bank account details of the account where you would like to receive your payouts.
The information required may vary depending on your business type.
-
Review your details. If the supplied details are correct, click on the Agree and Submit button to submit your application.
At the end of the application process, in most cases, the application will be approved and you will be taken back to the DecoNetwork Payment Methods page.
If your application requires review, it can typically take 1 to 2 business days to complete. If this happens, you will have to return to the DecoNetwork Payment Methods page to complete the setup after your application has been approved.
Configure DecoPay:
-
Browse to Admin → Settings → Payment Methods.
The Payment Methods page will be displayed.
Click the image to enlarge.
-
Click on the Configure DecoPay button.
The DecoPay configuration page will be displayed.
Click the image to enlarge.
-
Configure the DecoPay settings as required.
The DecoPay settings will be broken up into General information and options and settings for each of the payment methods available.
General
The General screen will contain a summary of the payments processed in DecoPay and settings to choose what payment methods you want to make available to your customers.
Payments Summary
You can click on the View Payouts, View Transactions, and View Disputes links to see a history of all payouts, transactions, and disputes respectively.
Select Payment Methods
You can select which payment methods you want to offer in your stores by ticking the checkbox of the desired payment methods. The available payment methods will vary depending on the country you are in.
Click the image to enlarge.
Payment Method Settings
For each payment method, you will able to configure the name and description, pricing and limits, the locations you want the payment method to be available in and the availability of the of the payment method across your fulfillment center.
Rename
The Rename screen allows you to override the default Name and default Description of the payment method and customize your credit card Statement descriptor prefix.
Click the image to enlarge.
The Statement descriptor prefix field lets you override the default prefix, which is set to your company name. Specify a custom prefix to create a more recognizable label. A clear descriptor helps reduce disputes and enhances customer trust, saving you time and money.
Keep in mind that the entire descriptor (prefix + suffix) can be up to 22 characters, with the prefix and order number separated by an asterisk (*).
Pricing and Limits
The Pricing and Limits screen lets you specify the minimum and maximum order value that you want to allow for the payment method and set surcharges to pass processing fees on to customers when they use the payment method. The transaction prices and chargeback prices will be listed at the top of the page.
Click the image to enlarge.
Set Limits
The Pricing and Limits screen lets you specify the Minimum Order Value and override the default Maximum Order Value that you want the payment method to be available for. The transaction fees and chargeback fees will be listed below the limit settings.
Click the image to enlarge.
Surcharges
Surcharges allow you to configure charges to pass merchant payment processing fees on to customers. The fees are included in the final amount of a customer order. You can configure surcharges as a percentage of the transaction amount or a flat rate.
Before configuring surcharges, make sure they are compliant with any laws applicable to your business and region.
You can configure surcharges for payments using a domestic card (Domestic Card Transaction Surcharge), payments using premium cards (Premium Card Transaction Surcharge), payments using a card from the European Economic Area (EEA Transaction Surcharge), and payments using an international card (International Card Transaction Surcharge).
Refer to the article, Understanding Processing Fees in DecoNetwork's DecoPay: A Guide to Card Types and Rates for detailed information about the DecoPay merchant payment processing fees.
Surcharge Breakdown (credit cards only)
The Hide Surcharge Breakdown setting lets you choose whether to show a breakdown of the credit card surcharges below the surcharge description or to hide the breakdown and include the surcharge amount in the description.
Location
The Location screen lets you choose the countries in which you want the payment method to be available. By default, the payment method will be available in all countries. Untick the Available for all countries checkbox to choose the individual countries in which you want the payment method to be limited.
Click the image to enlarge.
Availability
The Availability screen lets you choose what parts of DecoNetwork will be allowed to use the payment method.
Click the image to enlarge.
-
Availability: lets you choose if the payment method is available for orders placed via the web store and if it is available for orders placed in Business Hub orders.
- Active for Web enables the method in Web stores.
- Active for Business Hub enables the method in Business Hub.
-
Global: lets you toggle the global availability of the payment method.
- This is available in all stores by default: select this option to make this payment method available in the storefront and in Business Hub for all stores.
- This is not in any store by default: select this option to hide the availability of this payment method from the storefront and Business Hub for all stores.
- Store Group: determines which stores can access the payment type as determined by their group setting. You can see what groups have access set and edit them or click Add Rule to create a new group-based rule. The rules will either specifically include or exclude the group from access to the payment method.
-
Store: sets availability by explicitly denying or allowing specific stores access to the payment type.
(D) seen after the store name indicates that the store has been deleted.
-
Availability: lets you choose if the payment method is available for orders placed via the web store and if it is available for orders placed in Business Hub orders.
- Click Save once you are done configuring the settings.
View payouts:
Payouts are funds received from your customers that get deposited into your bank account. Funds, once cleared, are scheduled to be deposited into your account daily. In most cases, funds are cleared 2-3 days after a sale has been made.
-
Browse to Admin → Settings → Payment Methods.
The Payment Methods page will be displayed.
Click the image to enlarge.
-
Click on the Configure DecoPay button.
The DecoPay configuration page will be displayed.
Click the image to enlarge.
-
Click on the View Payouts link.
The DecoPay Payouts screen will be displayed.
Click the image to enlarge.
-
Click on the View Transactions button next to the payout you want to view.
The DecoPay Transactions screen will be displayed.
Click the image to enlarge.
You can search for particular transactions by entering your search criteria in the fields within the Search panel.
View transactions:
You can view a history of all your customer transactions on the DecoPay Transactions screen. These include all the earnings and refunds on orders placed in your DecoNetwork system.
-
Browse to Admin → Settings → Payment Methods.
The Payment Methods page will be displayed.
Click the image to enlarge.
-
Click on the Configure DecoPay button.
The DecoPay configuration page will be displayed.
Click the image to enlarge.
-
Click on the View Transactions link.
The DecoPay Transactions screen will be displayed.
Click the image to enlarge.
You can search for particular transactions by entering your search criteria and using the filters in the fields within the Search panel.
Note that for refunded payments, processing fees from the original transaction will not be returned. Refunds may also incur fees in some cases.
Manage disputes:
A dispute occurs when a customer contacts their banking institution and challenges a charge on their account. When a customer initiates a dispute, a temporary hold will be placed on the transaction until the dispute has been resolved. You can manage and respond to disputes in DecoPay.
-
Browse to Admin → Settings → Payment Methods.
The Payment Methods page will be displayed.
Click the image to enlarge.
-
Click on the Configure DecoPay button.
The DecoPay configuration page will be displayed.
Click the image to enlarge.
-
Click on the View Disputes link.
The Disputes screen will be displayed.
Click the image to enlarge.
-
Click on the Edit button next to the dispute you want to respond to.
The Manage Dispute screen will be displayed.
Click the image to enlarge.
-
Respond to the dispute.
Assess the dispute details and decide on the appropriate response. You can either challenge the dispute by submitting evidence or accept liability by conceding the dispute.
Submit Evidence
To submit evidence, scroll down to the Evidence section and tick the checkboxes of the type of evidence you want to submit. Click on the Edit button beside the evidence type you have ticked. This will bring up a popup window allowing you to select items to attach (such as emails and receipts), enter any evidential details, and upload files supporting your position. Click on the Submit Evidence button to submit the evidence to the issuing financial institution.
Concede Dispute
If you assess that the dispute is legitimate, you can choose to concede the dispute. Click on the Concede Dispute button. A confirmation popup will be displayed.
Click Concede Dispute to confirm. Note that once you concede, the dispute, it cannot be reversed.
- Click Save.
Update your bank account details:
Having accurate and up-to-date payment information is essential for ensuring smooth financial transactions. Updating your bank details is straightforward and can be done through the Stripe dashboard. This tutorial will guide you through the steps necessary to navigate the Stripe dashboard and update your bank details.
-
Browse to Admin → Settings → Payment Methods.
The Payment Methods page will be displayed.
Click the image to enlarge.
-
Click on the Visit Stripe Dashboard button.
The DecoPay configuration page will be displayed.
Click the image to enlarge.
- Log in to your Stripe account.
- Go to Settings → Business Settings → External Payout Accounts and Scheduling.
- Click Edit.
- Enter your new bank account details.
- Click Edit account to save.
Best-practice tips
- Start in Testing Mode: Use DecoPay Testing Mode to validate checkout, payment methods, and order workflows before processing live transactions.
- Complete identity verification early: Testing Mode is operational after you’ve entered your personal details and successfully verified your identity.
- Offer only what you need: Enable a small set of payment methods first, then expand once you’ve confirmed they work as expected in your stores.
- Use a clear statement descriptor: A recognizable descriptor can reduce customer confusion and help prevent disputes.
- Review surcharge compliance: If you enable surcharges, confirm they meet requirements for your region before turning them on.
Troubleshooting
I can’t see the “Signup” button for DecoPay
- Confirm you are logged in as an Administrator.
- Go to Admin → Settings → Payment Methods and ensure you are viewing the correct store/system.
DecoPay Testing Mode isn’t operational
- Confirm your system is currently in Testing Mode.
- Confirm you have completed the DecoPay setup with your personal details and your identity verification has been successfully approved.
- If your application is still under review, wait for approval (this can take 1–2 business days in some cases), then return to Payment Methods to finish setup.
A payment method I expected isn’t available
- Payment method availability can vary by country.
- Check Select Payment Methods in the DecoPay configuration and confirm the method is enabled.
- Review the payment method’s Location and Availability settings (web store vs Business Hub, store rules, etc.).
FAQs
What is DecoPay Testing Mode?
DecoPay Testing Mode lets you safely test checkout and payment workflows before processing live transactions. It is operational while your system is in Testing Mode after you have configured DecoPay with your personal details and successfully verified your identity.
How fast are payouts with DecoPay?
In most cases, funds clear 2–3 days after a sale has been made, and cleared funds are scheduled to be deposited into your account daily.
Do refunds return the original processing fees?
No. Processing fees from the original transaction are not returned for refunded payments. Refunds may also incur fees in some cases.
If I already use a payment gateway, will it stop working?
No. If you are an existing customer and already have an integrated payment gateway configured, your current payment gateway will remain active unless you switch to DecoPay.
Can I still use an external payment gateway instead of DecoPay?
Yes. You can integrate an external payment gateway by enabling the Payment Gateways app (available payment options depend on your configuration and region).
Additional Resources
- Payment Methods
- Enable External Payment Gateway Integrations
- What is the difference between test and live mode?
Still have questions? Use the Search Tool at the top of the page to find more related guides. Need help? Click the icon to submit a support ticket—our Client Services team is ready to assist!
Comments
2 comments
I am in Canada, so DecoPay Pricing will be international for me or it considered as Local for me?
Swetang Desai, pricing will be based on what sort of card is being used. Domestic cards will incur a domestic fee, cards from the European Economic Area will incur an EEA fee, and international cards will incur an international transaction fee.
Please sign in to leave a comment.