
Your DTF (Direct To Film) production settings tell DecoNetwork exactly how to generate the print-ready files your production team or printer needs, from image resolution and file format through to automated filenames. Because the system retains these settings, they're applied automatically every time an order reaches production, so configuring them to match your equipment and workflow keeps DTF production consistent and reduces manual file handling.
In This Article
- Prerequisites
- Why use this feature?
- Step 1: Open DTF Printing production settings
- Step 2: Configure Production Options
- Step 3: Configure Production Format Options
- Step 4: Configure Alternate Format Options
- Step 5: Save your settings
- Best Practices
- Troubleshooting
- FAQs
- Additional Resources
Prerequisites
- You must have Admin access to use this feature.
- DTF Printing must already be enabled as a decoration process you support.
Why use this feature?
DTF production settings control the resolution, file format, and filename structure DecoNetwork uses whenever it generates a production file for a DTF order. Because the system retains these settings and applies them automatically at production time, getting them right once means every DTF order that follows produces files your equipment and production team can use immediately, without manual adjustment.
- Keep print quality consistent by rejecting or down-sampling graphics that don't meet your printer's resolution
- Automate production file naming so files carry the print mode, sizing, and quantity information your workflow needs
- Match production files to whatever software or equipment step comes next, including gang sheet building
- Reduce manual file preparation and rework caused by mismatched formats or missing information
- Control how team names, transparency, and background color are handled across every DTF order automatically
Step 1: Open DTF Printing production settings
- Log into your DecoNetwork Website.
-
Browse to Admin → Decoration Processes.
The Admin button in the DecoNetwork backend.
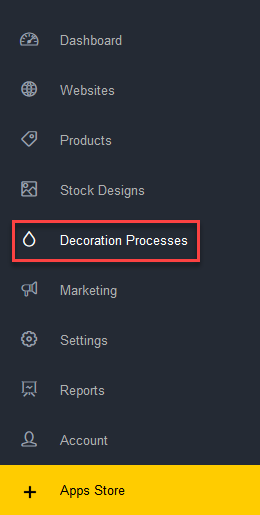
The Decoration Processes option in the Admin navigation menu.
-
Select Transfer, then click Production Settings.
The Production Settings menu item under the Transfer decoration process.
The production settings for DTF Printing appear in the main work area, ready to configure.
Step 2: Configure Production Options
-
Minimum DPI sets the lowest DPI (dots per inch) the online designer will accept as a reasonable-quality graphic.
If a graphic falls below this DPI, whether because it started low resolution or was enlarged or stretched, the online designer warns the customer that the graphic may produce poor results, so they can replace it before the order is submitted.
-
Production DPI should be set to the best or native resolution your printer supports. Images with a higher DPI than this are down-sampled to match.
Because of how image coordinates are currently stored, changing Production DPI renders all previously configured decorated products unusable. Set this value before building decorated products where possible. If you do change it, you'll need to rebuild any existing decorated products afterward.
-
Ignore raster upload's embedded DPI when lower than production DPI: when ticked, an uploaded raster image's embedded DPI is ignored if it's below your Production DPI.
The image is instead sized according to Production DPI in both the online designer and product design previews, so low-DPI metadata on an upload doesn't undersize the graphic.
Step 3: Configure Production Format Options
These settings control the primary production file DecoNetwork generates for your production team.
- File format selects the type of file sent to your production team for creating the decorated product. Choose the format that best suits your internal business process.
-
Filename Format lets you build the production filename from variable placeholders, so the filename itself carries information your printing machine or workflow can use to automate print mode, media size, and sizing and positioning on the page.
The placeholder options available are:
- [ORDER_ID]: the invoice number of the order.
- [ITEM_ID]: the unique identifying number of a line item.
- [VIEW_NAME]: the name of a product view.
- [AREA_NAME]: the name of a product view area.
- [LINEITEM_QTY]: the quantity of an item ordered.
- [LINEITEM_SIZES]: the sizes of each item ordered.
- [PRODUCT_COLOR]: the name of a product color.
- [PRODUCT_COLOR_TYPE]: the color category the color is in; light, white, or dark.
- [PRODUCT_CODE]: the identifying code of a product.
- [PRODUCT_BRAND]: the brand name of a product.
- [PROCESS_ABBR]: the abbreviation of a decoration process.
- [PROCESS_NAME]: the name of a decoration process.
- [DESIGN_NAMES]: the names of each design added to a blank product.
- [ORDER_PAY_REQ_ME]: true or false, indicating whether the order has been paid.
- [ORDER_ART_APPROVED]: true or false, indicating whether the order's artwork has been approved.
If the data for a variable doesn't exist for a given order, that variable is left out of the filename rather than showing as blank or an error.
New DTF Printing setups default to including [LINEITEM_QTY] at the end of the Filename Format, so the line item quantity is visible directly in the production filename. This is especially useful when building DTF gang sheet transfers, and you can edit or remove this placeholder at any time.
-
Vector antialiasing (smoothing mode) sets the antialiasing behavior when vector images are converted to raster. This option is only available for .jpg, .png, and .tif file formats.
- No antialiasing: no smoothing is applied to the image.
- Full antialiasing: maximum smoothing is applied to the image.
- No antialiasing on transparent edges: smoothing is applied to the image except where a solid opaque region meets a transparent region.
- Crop image becomes available when PNG is selected as the production file format. When enabled, it crops transparent space from around an image, bringing the image edge back to where non-transparency begins. Select the option that best suits your equipment. NOTE: only works on production files 10MB and smaller.
- Make transparent areas white, when ticked, places transparent images over a white background, converting the transparent areas to white. This option is only available for the .png file format.
-
Include Background Color, when ticked, includes the background color in production files if the customer has set a background color in the designer.
For this to work, customers must be permitted to set the background color at the product level, under Products → [Product] → Decoration Areas → Configure Areas (cog) → Allow Custom Decoration Areas (Advanced) → Configure Area (cog) → Allow Custom Decoration Area (Advanced) → select the area in the view image and tick Can set background color. This setting isn't normally used for garment decoration; it's more common for products like buttons and badges, and even then only when the printed media background isn't available in the requested color.
- Apply Area Shape becomes available when PNG is selected as the production file format. When ticked, it applies the area shape mask to the production file, so any part of the image outside the mask isn't printed.
-
Teamnames (less than 100 / more than 100) sets how production files are generated when team names are used in the design. You can configure separate behavior for under 100 team names and for 100 or more.
- 1 File per teamname: a separate production file is generated for each team name.
- 1 File with static background, and 1 Overlay file per teamname: one production file is generated with a background layer containing the static part of the design, plus a separate overlay layer for each team name.
- 1 File with static background, and 1 CSV file containing teamnames: one production file is generated with only the static background part of the design, along with a CSV file listing the team names for you to reference when manually creating each team name's production file.
Step 4: Configure Alternate Format Options
Alternate Format settings control a second production file, generated in a format better suited for manual editing. The same fields are available here as in Step 3, with the same placeholder options for Filename Format, and a couple of differences worth noting:
- File format selects the format of production files that need editing.
-
Filename Format uses the same placeholder options listed in Step 3.
The Alternate Format also defaults to including [LINEITEM_QTY] at the end of the Filename Format for new DTF Printing setups, for the same reason as the main Production Format above.
- Vector antialiasing (smoothing mode), Make transparent areas white, Include Background Color, Apply Area Shape, and Teamnames behave the same way here as described in Step 3, configured independently for the Alternate Format file.
-
Crop image becomes available when PNG is selected as the Alternate Format file format, and behaves the same as in Step 3. NOTE: only works on production files 10MB and smaller.
When Kornit is selected as your DTG machine, this option is forced on for the Alternate Format.
Step 5: Save your settings
- Review the Production Options, Production Format Options, and Alternate Format Options and configure them as required.
-
Click Save.
Your DTF production settings are saved and retained, so they're applied automatically the next time a DTF order is submitted for production.
Best Practices
- Set Production DPI before building any DTF decorated products. Changing it later makes existing decorated products unusable until they're rebuilt.
- Use Filename Format placeholders that match what your printer or gang sheet software expects, so production files route and print automatically instead of needing manual sorting.
- Keep the default [LINEITEM_QTY] placeholder in place if you build DTF gang sheets, since it lets you see quantity at a glance without opening each file.
- Choose an Alternate Format only when your workflow genuinely needs an editable file in addition to the production file; otherwise, keep production simpler with just the main Production Format.
- Confirm your Teamnames setting matches how your production team actually processes team name orders before volume builds up, since switching formats later means adjusting an established process.
Troubleshooting
Problem: Existing decorated products stopped working correctly after a settings change.
Cause: Production DPI was changed after decorated products were already built.
Solution: Rebuild the affected decorated products. To avoid this going forward, finalize Production DPI before creating decorated products.
Problem: A production filename is missing a piece of information you expected.
Cause: The placeholder's underlying data doesn't exist for that order or line item.
Solution: This is expected behavior. When data for a variable isn't available, DecoNetwork leaves that placeholder out of the filename rather than showing it blank.
Problem: Crop image isn't cropping a production file as expected.
Cause: Crop image only applies to production files 10MB or smaller.
Solution: Check the file size of the generated production file. Files over 10MB won't be cropped regardless of this setting.
Problem: Team name orders aren't producing the file structure you expected.
Cause: The Teamnames setting for the relevant threshold (under 100 or 100+) doesn't match what your production process needs.
Solution: Review the Teamnames options for both thresholds in Step 3 and Step 4 and select the behavior that matches your workflow.
FAQs
What's the difference between Production Format and Alternate Format?
Production Format generates the main file sent to your production team or equipment. Alternate Format generates a second file, in a format better suited for manual editing, using the same configuration options.
Why did my decorated products stop working after I changed Production DPI?
Because of how image coordinates are stored, changing Production DPI makes previously configured decorated products unusable until they're rebuilt. Set Production DPI before building decorated products whenever possible.
Why is a placeholder missing from my production filename?
If the data for that variable doesn't exist for the order or line item, DecoNetwork leaves it out of the filename automatically rather than displaying it blank.
Can I use different Filename Format placeholders for Production Format and Alternate Format?
Yes. Both formats use the same set of placeholders, but each has its own independent Filename Format field, so you can structure the two filenames differently if needed.
Why is Crop image forced on for my Alternate Format?
If Kornit is selected as your DTG machine, DecoNetwork forces Crop image on for the Alternate Format automatically.
Additional Resources
Still have questions? Use the Search Tool at the top of the page to find more related guides. Need help? Click the icon to submit a support ticket – our Client Services team is ready to assist!
Comments
0 comments
Please sign in to leave a comment.