If you are a fulfillment center with multiple stores, you may set up different stores to target different market segments. DecoNetwork has a powerful price configuration system that allows you to configure pricing rules to set the regular retail price for individual products and for product groups. You can use product groups feature to easily set alternative pricing for a group of products for a particular affiliate store. To do this you will need to create a product group, configure the pricing for that product group, then create a set of products that you are going to use in your affiliate store and assign those products to that product group.
Watch the following video to see how to use alternate decoration prices at the store level. Read below for written instructions.
Prerequisites
- You must have administrator access to use this feature
- An understanding of product configuration (see the help article "Products Overview" to get started)
- The Product Groups app must be enabled. Visit the Apps Store to enable the app (located in the Product Extensions section).
In this article, you will learn how...
To configure alternate pricing for a product group:
- Log into your DecoNetwork Website.
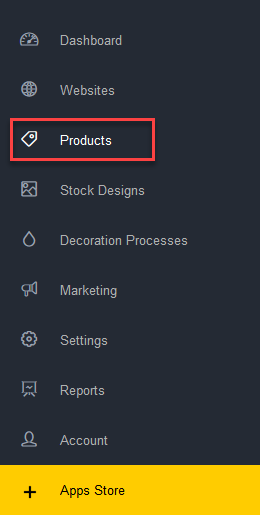
- Browse to Admin > Products.


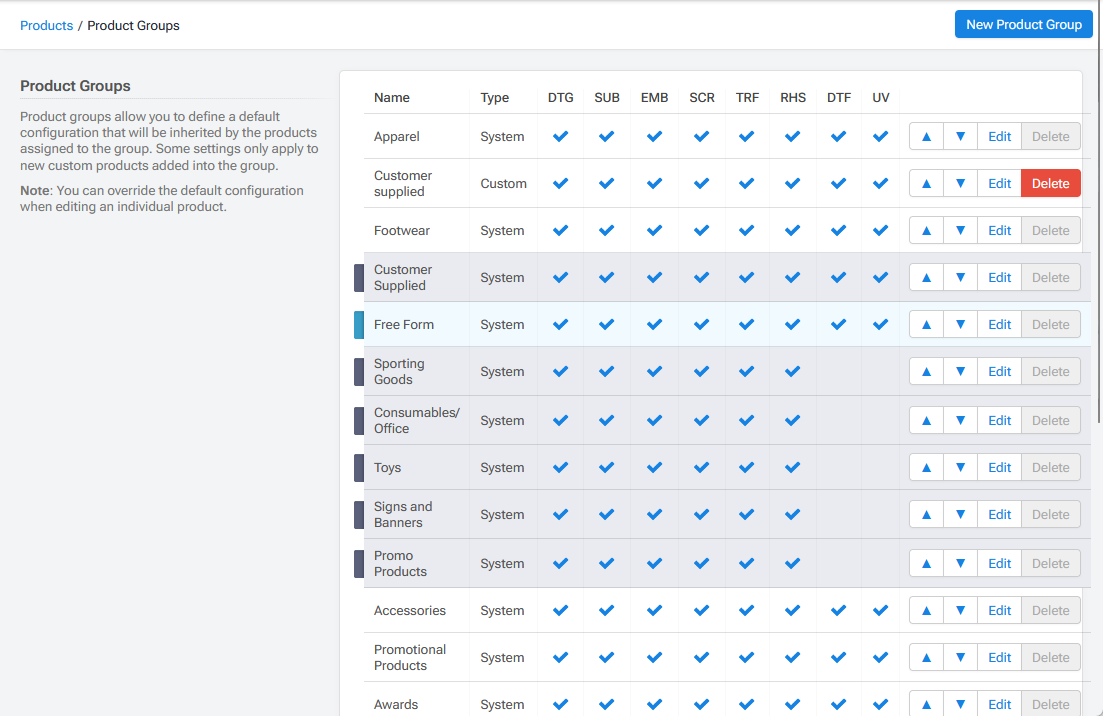
- Select Product Groups.
The main work area displays a list of existing Product Groups.
-
Click the New Product Group button.
The product group configuration screen will be displayed.
- Configure the product group.
-
General
- Active toggles the active state of the default group.
- Name lets you specify a name for the default group.
- Default category for new products assigned to this group lets you set what category any products in the default group will appear in, as seen in the product selector and in the web store.
-
Decoration Processes lets you set the decoration pricing and process mixing rules for each decoration process you support for the product group.
Contract Price Level (Premium & Enterprise levels only)
Contract price levels are the different tiers of selling prices that you offer your customers. The levels are defined via Admin > Products > Contract Price Levels. (See the Contract Price Levels help article for instructions). All levels that you have defined will appear here. This section allows you to switch between the different price levels to configure the decoration prices of each level.
To configure the decoration pricing of a contract price level, select its corresponding radio button.
Decoration Processes and Pricing
For each contract price level, you can choose to Use System Decoration Pricing or Specify Custom Decoration Pricing. System decoration pricing is the default decoration pricing specified via Admin > Products > Decoration Processes > Decoration Pricing. Read the Decoration Pricing help article for instructions on how to configure system decoration pricing.
Selecting the Specify Custom Decoration Pricing radio button will enable the fields for configuring custom pricing.
- Active: If this checkbox is ticked, the corresponding decoration process will be available for the selected contract price level.
- Use System Decoration Prices: If this checkbox is ticked, system decoration prices will be used for the corresponding decoration process. When this checkbox is unticked, you will be able to choose the pricing method and specify the decoration prices for the decoration process.
- Pricing Method: lets you choose a pricing method for the corresponding decoration process.
- Decoration Prices: lets you specify the pricing values for the corresponding decoration process. Fields will vary depending on the pricing method selected.
Select mixable processes
This section lets you specify the rules for what decoration processes are allowed in a single decoration area. Tick the checkboxes for the processes that each decoration process can be mixed with.
-
Pricing lets you specify a markup on supplier costs for the product group. The markup sets the blank product selling price in affiliate stores for products in this group.
As with Decoration Processes, you can also configure blank product pricing for each contract price level. To configure the blank product pricing of a contract price level, select its corresponding radio button.
You have the following choices for configuring the blank product pricing for each contract price level:
Catalog Markup Pricing
- Use System Markup: Uses the markup setting configured at Admin > Products > Supplier Product Markup.
-
Specify Custom Markup: lets you specify the markup amount in one of two ways:
- Fixed Markup lets you set the percentage to mark up the wholesale price of all products by (regardless of the cost to you).
-
Tiered Markup lets you mark up the wholesale as a percentage (based on the cost to you) of the product.
- Add Markup Tier will add a new row to the markup table that lets you specify the cost price range. You must set Price From which defines the lower limit of the markup level, and the Markup Percentage for each markup level.
- Click Delete to remove a markup tier.

Volume Discount
- Discount Configuration lets you choose what volume discount will be applied from the drop-down box. These discounts must already be configured in Admin > Products > Volume Discounts.
- Taxes lets you configure the tax settings for the product group. Click here for instructions.
-
Minimum Quantities and Bundles lets you set the default minimum sale quantity and bundle sizes for the product group.
- Minimum Quantity: lets you specify the minimum quantity of products in this product group that you want your customers to be able to purchase.
-
Bundle Size Settings: lets you configure the bundle sizes of products in this product group that you want your customers to be able to purchase.
-
Use Bundles: tick this checkbox if you want your customers to be able to purchase products in this default product group in bundles.
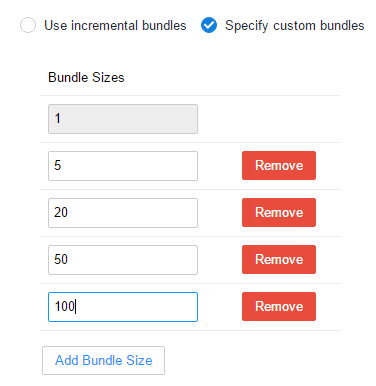
- Use incremental bundles: selecting this option will let you specify a value for Bundle size that will be used as a fixed number to increase each successive bundle size by. The number that you specify will be incrementally added to the minimum quantity to form the bundle sizes.
-
Specify custom bundles: lets you determine the exact size of bundles, useful if you are not offering bundles that are neat factors of smaller numbers. For example, you may offer bundles of 1, 5, 20, 50, 100. Use the Add Bundle Size button to add new bundle sizes. Press the Remove button to remove the required bundle size.

-
Use Bundles: tick this checkbox if you want your customers to be able to purchase products in this default product group in bundles.
-
Sizing lets you set the sizes available for the product group. By default, the sizes that have been set to 'ON' in Admin > Products > Sizes will be available for the product group. You can change the available sizes by clicking on the cog and ticking the Use Custom Configuration check box. The fields in the Size Table will be enabled for customization.
-
Shipping Dimension & Weights lets you set the default shipping prices levels and the dimensions and weight of all products in the default group. A zero value will not be taken into account as the default.
Shipping price level
- Shipping price level lets you choose a pre-defined shipping price level for the product group. Shipping price levels are defined via Admin > Settings > Shipping > Shipping Price Levels. Click here for more information about shipping price levels.
Shipping
- Length lets you specify the length of the package that will contain the product or products in their packed state.
- Width lets you specify the width of the package that will contain the product or products in their packed state.
- Height lets you specify the height of the package that will contain the product or products in their packed state.
- Weight lets you specify the default weight of the product group.
-
Production lets you specify the default amount of time required to produce products in the default group.
Production
The production settings let you define how long it takes to complete production for each decoration process in the production group. These times are used to provide estimated ship-by date and delivery date.
- Production Time lets you set the default production time for products in the product group.
- Use Default Production Times: select this option to use the default production times specified under the global Production & Order Pending Times settings (Admin > Settings > Production & Order Settings).
-
Specify Custom Production Times: select this option to specify custom settings for this product group. The Production Times fields will become enabled, allowing you to specify the number of days it takes to complete production for each decoration process.
If you sell products without any decorations, you can specify the default production days for blank products.
Production Statuses
Production Statuses settings let you configure production statuses that can be used to manage the production of all products using this default group.
By default, all system production statuses are available for use in product groups. System production statuses are defined under Settings > Production & Order Settings > Production Statuses. Click here for instructions on how to define system production statuses.
You can select the Specify Custom Production Statuses option to toggle each system production status on or off for this product group. The checkboxes will become enabled when the Specify Custom Production Statuses option is selected.
Un-tick the checkbox to make a status unavailable for the product group. Tick the checkbox to make the status available.
-
Purchasing lets you set the purchasing workflow for the product group.
- Purchase Order Workflow lets you set the default workflow behavior for the default group.
-
Inventory lets you customize the inventory settings for this product group to override the global out-of-stock behavior, which is set in Admin > Products > Inventory Settings.
- Use Default Inventory Settings: Choose this option to apply the standard out-of-stock behavior that has been configured globally in Admin > Products > Inventory Settings.
-
Specify Custom Inventory Settings: Choose this option to override the global out-of-stock inventory behavior. Select an option from the Out of stock behavior dropdown list:
- Allow adding to cart: Select this option if you want to allow customers to add out-of-stock products to their cart.
- Do not allow adding to cart (check on-hand inventory): Select this option if you want to stop customers from adding out-of-stock products to their cart.
- Do not allow adding to cart (check supplier inventory): Select this option if you want to prevent customers from adding products to their cart that are out of stock in supplier inventory.
-
Do not allow adding to cart (check both on-hand and supplier inventory): Select this option if you want to prevent customers from adding products to the cart that are out of stock in both on-hand inventory and supplier inventory.
- Supplier out of stock threshold (consider out of stock if available quantity is below the entered quantity): This field allows you to specify the minimum supplier inventory level at which you want to allow customers to add products to cart. If the supplier inventory level is equal to or less than the specified amount, customers will not be able to add products to cart when using supplier inventory settings.
-
Availability sets who and where the product group can be accessed.
-
Business Hub and Webstore Availability options determine if the product can be ordered via Business Hub and/or your web stores. Any option with web stores means the product will be available to all web stores.

-
Global options set the product's default availability in stores, in the same fashion as an on-off switch.

-
Group settings determine the availability of the product by store group. This works by first assigning stores to store groups, then assigning this product to specific groups. The Add Rule button lets you configure group availability. When clicked, the Select Groups popup is open.

You can search for defined groups by group name. To search, enter a group name in the Group name box and click Search. Select the group you wish to add to your rule and Click Add Selected Groups.
For the selected group, you can then allow or deny access to the selected product as required.

-
Store rules let you set availability on the store level.

Press Add Rule to configure store availability. When clicked, the Select Stores popup is open.

Search for and select stores you want to make a rule for and press Add Selected Stores. You can then specifically allow or deny product access to the selected stores.

-
Business Hub and Webstore Availability options determine if the product can be ordered via Business Hub and/or your web stores. Any option with web stores means the product will be available to all web stores.
- Custom fields will let you define extra data fields that are attached to all products in the default group, enabling data to be collected when a product belonging to the default group is ordered on the website.
-
General
- When you are done, click Save.
To assign a product to a product group:
- Browse to Admin > Products.


- Select the product you want to apply the product group to by either:
- Clicking on the product code.
- Clicking on the product name.
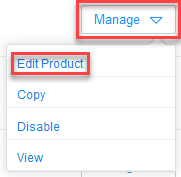
- Clicking on the Manage button beside the product you want to configure, then selecting Edit Product.

- Click change to change the Product Group used.
- Select a product group from the Product Group drop-down list.
- Click Save.

Comments
0 comments
Please sign in to leave a comment.